Car Won’t Start After Replacing the Crankshaft Sensor: (Fixed!)
Author:
Jack Oliver
Affiliate Disclaimer
As an affiliate, we may earn a commission from qualifying purchases. We get commissions for purchases made through links on this website from Amazon and other third parties.
If your car won’t start after replacing the crankshaft sensor, there could be a few possible reasons behind this frustrating issue.
Improper installation of the crankshaft sensor is one potential culprit. If the sensor isn’t installed correctly, it may not be able to detect the position of the crankshaft accurately, leading to starting problems. Another common reason for a non-starting car after replacing the crankshaft sensor is accidentally disconnecting the battery during the process.
In addition to these possibilities, a loose or damaged connector connected to the crankshaft sensor can disrupt its functionality.
A faulty connection can prevent proper signal transmission and result in a failure to start. Moreover, bad wiring within the connector itself may also contribute to this problem.
Table of contents
Common Reasons Why Car Won’t Start After Replacing the Crankshaft Sensor:
Reason
Description
Defective sensor
The new sensor may be defective. This is a relatively rare occurrence, but it is possible.
Incorrect installation
The sensor may not have been installed correctly. This can happen if the sensor is not properly seated or if the wiring is not connected correctly.
Other underlying issue
The CPS may not be the actual problem. If the car was not starting before the CPS was replaced, there may be another underlying issue, such as a bad fuel pump, a faulty ignition system, or a problem with the engine timing.
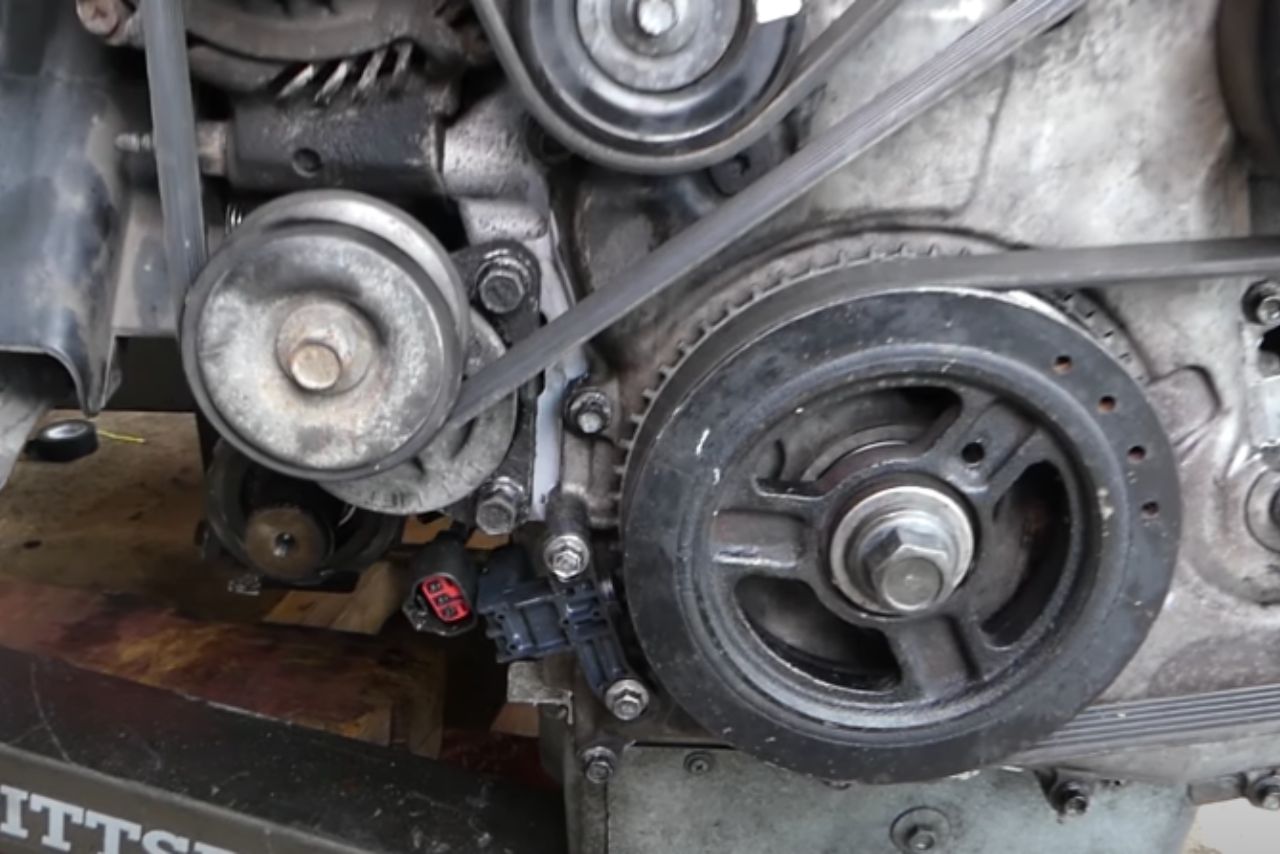
1. Improper Installation of the Crankshaft Sensor:
If your car won’t start after replacing the crankshaft sensor, one possible reason could be an improper installation of the sensor. Here are a few factors to consider:
Alignment: Ensure that the new crankshaft sensor is correctly aligned with its mounting position on the engine. A misaligned sensor can result in inaccurate readings and prevent your car from starting.
Secure Mounting: Double-check whether the sensor is securely mounted in place using the appropriate bolts or fasteners. Loose mounting may lead to vibrations and affect the proper functioning of the sensor.
Proper Clearance: Verify that there is adequate clearance between the crankshaft reluctor wheel and the tip of the sensor. If there isn’t enough space, it can cause interference and disrupt signal transmission.
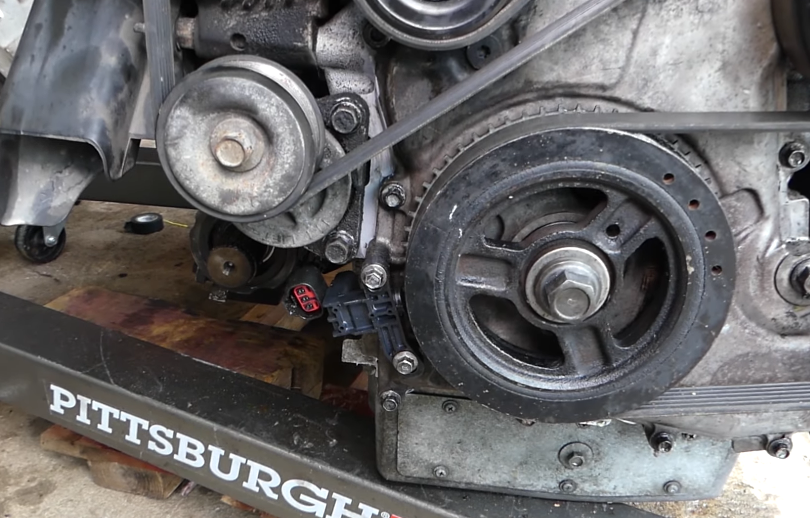
Connector Orientation: Pay attention to how you connect electrical connectors related to your vehicle’s sensors, including those for crankshaft position sensors. Make sure they are properly oriented without any bent pins or damaged wires.
Tight Connections: Ensure a firm connection by firmly plugging in all electrical connectors associated with the crankshaft sensor circuits (including power supply and ground connections) while avoiding over-forcing them which could lead to damage.
Inspect Wiring Harnesses: Examine all wiring harnesses connected to or near where you installed/replaced your crankshaft position sensor for any signs of damage such as frayed wires, loose connections, or corrosion.
2. Disconnected Battery by Mistake:
When replacing the crankshaft sensor, it’s not uncommon to accidentally disconnect the battery.
This simple mistake can prevent your car from starting even if you’ve installed the new sensor correctly.
Here are a few things to check if you suspect that a disconnected battery is causing the issue:
Check battery connections: Ensure that both terminals of your car’s battery are securely connected. Sometimes, during sensor replacement, these connections may have been inadvertently loosened or disconnected.
Inspect battery condition: Check the overall health and charge level of your vehicle’s battery. A weak or dead battery can also be one of the reasons why your car won’t start after replacing the crankshaft sensor.
Reset electronic systems: Disconnecting and reconnecting the battery will reset some of your car’s electronic systems, including its engine control unit (ECU). After reconnecting, allow a few minutes for these systems to reinitialize before attempting to start your vehicle again.
Scan for error codes: Use an OBD-II scanner to check for any stored error codes in your car’s ECU memory. These codes can provide valuable insights into potential issues related to sensors or other components.
Perform a hard reset: If none of the above steps resolve the problem, try performing a hard reset on your vehicle’s electrical system by disconnecting both terminals of the battery and touching them together for about 30 seconds (with caution!). Reconnect everything afterward and see if this resolves the starting issue.
Remember, always exercise caution when working with electrical components and consult a professional mechanic if you’re unsure about any step in this process.
By following these troubleshooting steps related to accidentally disconnecting your vehicle’s battery while replacing a crankshaft sensor, you should be able to get back on track with getting your car started successfully!
3. Loose or Damaged Connector of the Crankshaft Sensor:
If you have recently replaced the crankshaft sensor in your car and it still won’t start, one possible cause could be a loose or damaged connector.
The connector is responsible for establishing the connection between the sensor and the vehicle’s electrical system. Here are a few things to check if you suspect this issue:
Inspecting the Connector: Start by visually inspecting the connector itself. Look for any signs of damage such as broken pins, frayed wires, or corrosion. If you notice any issues, it’s crucial to address them before proceeding.
Ensuring Proper Connection: Make sure that the connector is securely plugged into both ends – one end connects to the crankshaft sensor and the other end connects to its respective socket in your vehicle’s wiring harness. Sometimes, during installation, connectors may not fully seat into their sockets due to misalignment or improper handling.
Cleaning Corroded Connectors: If there is corrosion present on either end of the connector, use an appropriate cleaner designed specifically for electrical connections. Gently clean off any dirt or debris from both sides of the connecting points before reconnecting them.
Repairing Damaged Connectors: In case you find any significant damage (e.g., broken pins) on either side of the connector, it might need repair or replacement. Consult with a professional auto technician who can help determine whether repairing or replacing would be more suitable based on their expertise.
4. Bad Wiring of the Crankshaft Sensor Connector:
If your car won’t start after replacing the crankshaft sensor, one possible cause could be bad wiring of the crankshaft sensor connector. Here are some key points to consider:
Check for loose or damaged wires: Inspect the wiring connected to the crankshaft sensor connector. Look for any loose or frayed wires that may disrupt proper electrical connection.
Ensure correct wire placement: Double-check that each wire is correctly placed in its respective pin slot within the connector. Refer to your vehicle’s service manual or a reliable online resource for accurate wiring diagrams.
Verify wire continuity: Use a multimeter tool set to measure resistance and check if there is continuity between each wire and its corresponding pin on both ends (sensor and ECU). If there is no continuity, it indicates a broken wire that needs repair.
Repair damaged wires: In case you find any damaged or broken wires during inspection, carefully strip off a small section of insulation from both ends using appropriate tools like wire strippers. Then, splice in new sections of matching gauge wires using connectors specifically designed for automotive applications.
Securely connect all wires: Ensure all wires are securely connected within their respective slots in the crankshaft sensor connector. It’s crucial to establish solid connections without any play or gaps that could lead to intermittent contact issues.
By addressing potential problems related to bad wiring of the crankshaft sensor connector, you can increase your chances of resolving starting issues after replacing this vital component in your car’s engine system.
Other Possible Causes for Car Not Starting After Replacing the Crankshaft Sensor:
Faulty ECM: A malfunctioning Engine Control Module (ECM) can prevent your car from starting even after replacing the crankshaft sensor. The ECM controls various engine functions, including ignition and fuel injection. If it’s not functioning properly, it may need to be repaired or replaced.
Timing Belt Issues: In some cases, a broken or improperly installed timing belt can lead to a no-start condition. The timing belt ensures that the pistons and valves in your engine move in sync. If the timing is off due to a faulty belt, it can cause serious damage and prevent your car from starting.
Fuel Delivery Problems: Insufficient fuel supply or clogged fuel lines can also result in a no-start situation. Even if you’ve replaced the crankshaft sensor correctly, if there are issues with fuel delivery, the engine won’t receive enough fuel to ignite.
Ignition System Failure: An ineffective ignition system could be another reason why your car won’t start after replacing the crankshaft sensor. Faulty spark plugs, ignition coils, or distributor components may need attention as they play a vital role in generating sparks needed for combustion.
Blown Fuse: Check if any relevant fuses related to ignition or engine management have blown out. A blown fuse could disrupt power supply to critical components like sensors or control modules necessary for proper starting of your vehicle.
Remember that troubleshooting complex automotive issues requires expertise and diagnostic tools beyond what an average person might possess. It’s often best to consult with a qualified mechanic who has experience with these types of problems.
Troubleshooting Steps to Fix a Car That Won’t Start After Replacing the Crankshaft Sensor:
If your car is not starting after replacing the crankshaft sensor, there are several troubleshooting steps you can take to address the issue. Here’s what you can do:
Double-check installation: Ensure that the crankshaft sensor has been installed correctly. Make sure it is properly aligned and securely fastened in place.
Inspect battery connection: Accidentally disconnecting the battery while working on the crankshaft sensor can lead to starting issues. Check if any cables have been disconnected or damaged during the process. Reconnect any loose connections if necessary.
Examine connector condition: Inspect both ends of the connector attached to the crankshaft sensor for any signs of damage or looseness. If there are visible issues, such as bent pins or corrosion, repair or replace the connector as needed.
Check wiring integrity: Verify that all wires connected to the crankshaft sensor are undamaged and securely connected at both ends. Pay close attention to frayed wires, loose connections, or improper routing.
Test signal output: Use a multimeter set on AC voltage mode (if applicable) and check for proper signal output from the crankshaft sensor when cranking over your engine with someone else assisting you.
Consult professional help: If none of these troubleshooting steps resolve your car’s starting issue after replacing the crankshaft sensor, it may be best to seek assistance from a qualified mechanic who specializes in automotive electrical systems and diagnostics.
Following these steps should help you identify and fix common issues that can arise after replacing a crankshaft sensor, allowing your car to start smoothly once again.
Preventive Measures to Avoid Issues When Installing a New Crankshaft Sensor:
When it comes to installing a new crankshaft sensor in your car, taking some preventive measures can help you avoid common issues that may arise during the installation process.
By following these tips, you can ensure a smooth installation and prevent any trouble with starting your car afterwards:
Read the manufacturer’s instructions: Before beginning the installation, carefully read through the manufacturer’s instructions provided with the new crankshaft sensor. This will give you important information about proper installation techniques specific to your vehicle.
Disconnect the battery: Prior to replacing the crankshaft sensor, disconnecting the battery is crucial for safety reasons. Ensure that you remove both positive and negative terminals from their respective battery posts before proceeding with any work.
Inspect connectors and wiring: Thoroughly inspect all connectors and wiring related to the crankshaft sensor before removing it. Look out for loose or damaged connectors or wires that may need repair or replacement prior to installing the new sensor.
Handle with care: Treat your new crankshaft sensor delicately throughout its entire handling process to prevent damage during installation. Avoid dropping or mishandling it as this could lead to malfunctioning later on.
Proper alignment: Make sure that when positioning and aligning your new crankshaft sensor, it sits correctly in place without being forced into position forcefully or misaligned in any way.
Secure connections properly: After inserting/connecting the new cranks.
Conclusion and final thoughts 💭
If your car is not starting after replacing the crankshaft sensor, there are several potential reasons to consider.
Firstly, improper installation of the crankshaft sensor could be the culprit. It is essential to follow the correct procedure and ensure that it is securely fitted in place.
Secondly, double-checking whether you accidentally disconnected the battery during the replacement process is crucial. Sometimes a simple mistake like this can prevent your car from starting up properly.
Another possibility to investigate is a loose or damaged connector related to the crankshaft sensor. Inspecting all connections and ensuring they are secure and functioning correctly may resolve any issues.
Lastly, faulty wiring within the crankshaft sensor connector could also be causing problems. Examining the wiring for any signs of damage or wear can help identify if this component needs attention.
By addressing these potential causes – improper installation, accidental battery disconnection, loose/damaged connectors, and faulty wiring – you increase your chances of fixing why your car won’t start after replacing the crankshaft sensor successfully.
Jack Oliver, is a car enthusiast with a keen eye for choosing the perfect accessories for cars and conducting thorough testing of various automotive products. Jack’s expertise lies in exploring the world of oils, lubricants, additives, and other accessories that enhance the performance, aesthetics, and overall driving experience.


Leave a Reply