
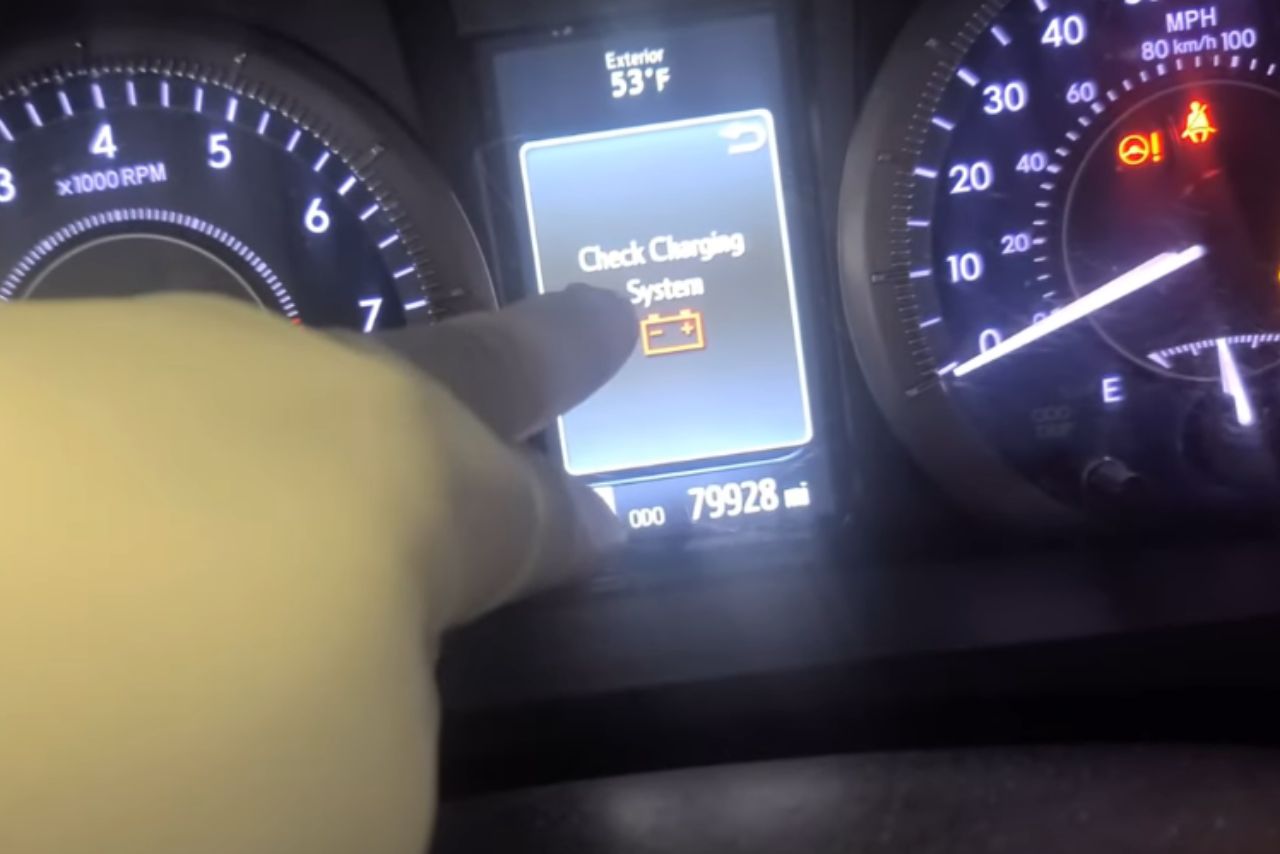
When the “Check Charge System” light illuminates on your Honda dashboard, it’s a clear signal that there may be an issue with your vehicle’s charging system.
This could mean problems with components like the alternator or battery which play critical roles in keeping your car running smoothly. In this article, we will dive into what exactly this warning means and how you can fix it.
It is important not to ignore this alert as doing so could lead to more serious mechanical issues down the line.
We’ll guide you through understanding the cause of this warning and provide practical solutions to get your Honda back on track.
Check Charge System 100% Solution:
SUCCESS
After replacing the battery and alternator, receiving a Check Charge System message? AC rough idling? Possible voltage sensor issue. Consider replacing Battery Charging Sensor Connector Pigtail Harness. Ensure alternator replacement quality.
Here In the below image You Can see the proof 👇, one of our reader Monoblock00 who fixed his Check Charge System problem by using our method this issue was due to Battery Charging Sensor Connector and Pigtail so, he replaced the Battery Charging Sensor and Connector Pigtail Harness and the issue got fixed! 😍

Table of Contents
Understanding the Charging System in a Honda:
The charging system in your Honda plays a critical role. It ensures that all electrical components of your vehicle are adequately powered up at all times. Here’s what you need to know:
Here’s how everything comes together:
- When you start the car, power from the battery operates starter motor.
- Once engine runs, alternator takes over supplying power.
- Voltage regulator makes sure voltage stays within safe limits.
- Surplus electricity generated goes back into recharging battery.
| Component | Function |
|---|---|
| Battery | Stores energy; Powers starter motor & other systems |
| Alternator | Charges battery; Powers electrical systems |
| Voltage Regulator | Maintains proper voltage level |
It’s essential for these parts to work properly since any malfunctioning can trigger a “Check Charge System” warning on your Honda dashboard!
Symptoms of a Faulty Charging System in a Honda:
If your Honda’s charging system is failing, you’ll notice several signs. Here are some common symptoms to look out for:
In addition to these symptoms, you might also observe specific issues based on certain models. Refer to this table below for model-specific characteristics:
| Model | Symptom |
|---|---|
| Accord | Rapid clicking sound when trying to start |
| Civic | Trouble starting after short trips |
These telltale signs should alert you before total failure occurs. It’s best practice never ignore these warnings – have your vehicle inspected by professionals promptly!
Causes of Check Charge System Issues in a Honda:
Various factors can result in charging system issues with your Honda. Identifying these causes will aid you in timely and proper resolution:
Below table lists some signs that may indicate these problems:
| Signs | Possible Cause |
|---|---|
| Battery light on dashboard flickering or staying on | Faulty Alternator |
| Difficulty starting car | Dead/Worn-Out Battery |
| Dimming lights when engine revs low | Damaged Cables/Wires |
| Squealing noise under hood | Broken Drive Belt/Pulley |
Remember, regular maintenance checks can help avoid serious charging system issues.
Here’s a video for more insights:
Diagnosing the Charging System in a Honda:
To diagnose issues with your Honda’s charging system, follow these steps:
4.On observing any abnormal readings—either too high or too low—it points towards an issue with either your alternator or regulator.
Apart from this, there are certain symptoms you can look out for that may indicate an issue with your charging system:
- Warning light on dashboard
- Dim headlights
- Weak or dead battery
- Difficulty starting
| Symptom | Possible Issue |
|---|---|
| Warning light on dashboard | Faulty alternator |
| Dim headlights | Bad alternator or poor connection |
| Weak/dead battery | Alternator not charging properly |
| Difficulty starting | Failing starter motor |
Remember, diagnosing accurately is key before looking into fixes!
Checking the Battery Voltage in a Honda:
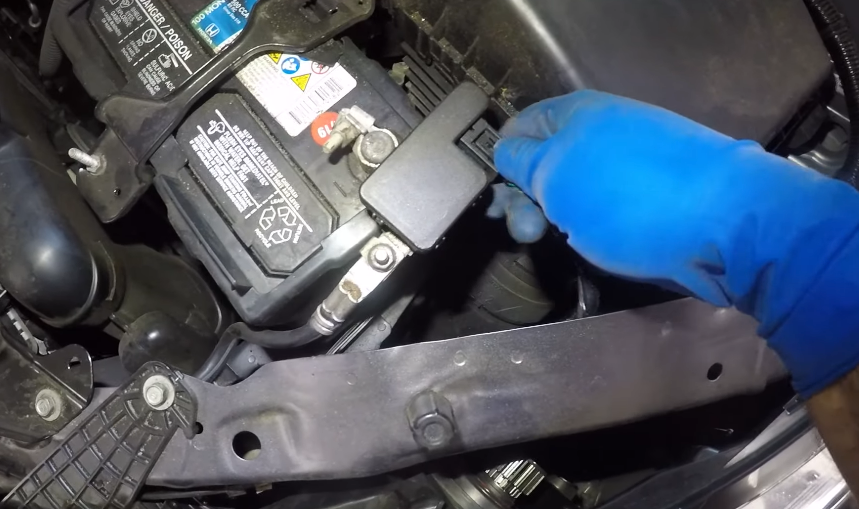
One of the first steps to diagnose ‘Check Charge System’ warning is to check your Honda’s battery voltage. Here’s how you can do it:
You’ll see two types of connections on your battery:
- Positive terminal (Red or ‘+’)
- Negative terminal (Black or ‘-‘)
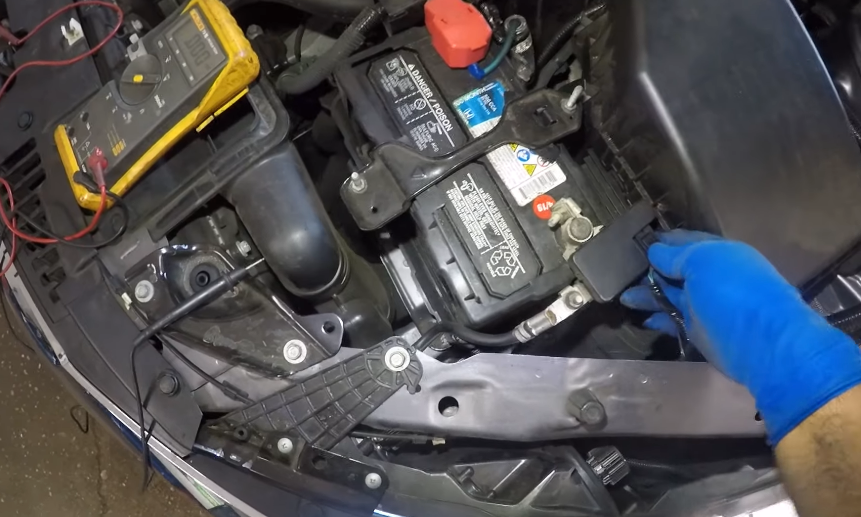
Now let’s move onto measuring voltage:
- Connect Multimeter probes:
- Connect Red probe to positive terminal
- Connect Black probe to negative terminal
- Read Multimeter:
The reading should fall between these ranges for different states:
| State | Voltage |
|---|---|
| Fully charged | 12.6 – 12.8 V |
| Charged (normal) | 12 – 12.6 V |
| Discharged (<25%) | <11V |
If your battery falls into the discharged category, you might need a new one or try charging it first before replacing.
Remember that this method provides an approximate idea about your battery health and may not entirely resolve ‘Check Charge System’ error if there are other underlying issues with alternator performance etc.
Note: Always take precaution while handling electrical equipment such as disconnecting power supply and wearing insulated gloves wherever necessary.
Inspecting the Alternator Belt on Your Honda:
The alternator belt, also known as the serpentine belt, plays a crucial role in your Honda’s charging system. If it’s damaged or loose, you’ll see a ‘check charge system’ warning.
Here are steps to inspect and possibly fix issues with the alternator belt:
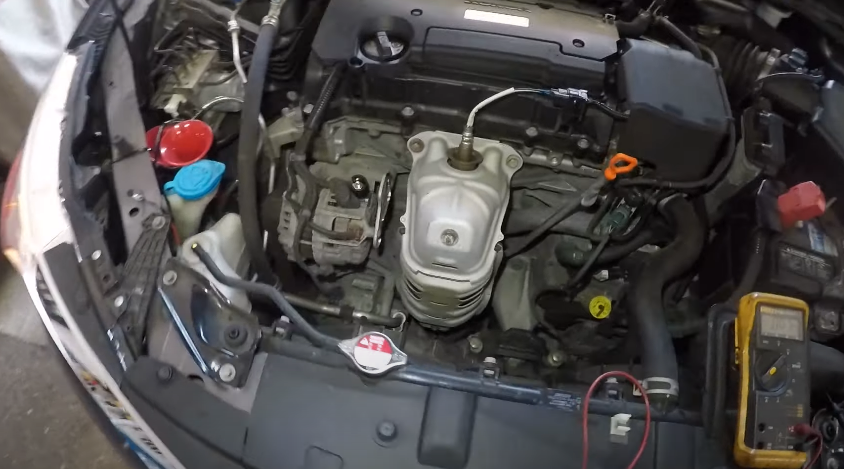
Locate the Alternator:
The alternator is usually found at the front of the engine. Look for a component with a pulley.
Inspect the Belt:
Check if it’s too tight, too loose, or showing signs of wear like cracks or fraying.
- Good Condition: No noticeable damage
- Worn Out: Cracks, frays or splits are present
Check Tension:
Press down lightly on the belt midway between two pulleys. It should deflect about 1/2 inch.
Spin Test:
With engine off and keys removed from ignition for safety reasons turn each part that has its own pulley within this system (alternator included) they should spin freely without any grinding noise.
| Issue Detected | Fix Required |
|---|---|
| Loose Belt | Adjust tensioner to tighten |
| Tight Belt | Loosen via tensioner |
| Wear & Tear Signs | Replace altnerator belt |
Remember: Always consult your owner’s manual before performing these checks!
WARNING
Stay safe! If you’re not comfortable doing this by yourself, take your vehicle to an experienced mechanic.
If after inspection and possible fixes issue persists then professional help is advised as problem might be electrical rather than mechanical in nature!
Testing the Alternator Output in Your Honda:
To test the alternator output of your Honda, follow these steps:
Now you’re ready to measure voltage across battery terminals using a digital multimeter.
| Terminal | Voltage (V) |
|---|---|
| Positive (+) | Around 14 – 15 V |
| Negative (-) | 0 V |
If readings are not within this range, it could indicate an issue with your alternator or charging system.
Next step: checking for AC leakage. Here’s how:
- Set your multimeter to AC scale.
- Connect meter leads across battery terminals.
- Measure and record reading.
Reading should ideally be less than 0.1V. A higher value indicates faulty diodes inside alternator.
Finally, check belt tension:
- Press midway between pulleys on longest span of belt.
- If deflection is more than specified value (usually around half an inch), adjust tension as needed.
Remember: if you’re unsure about any part of this process or if problems persist after testing, consult with a certified mechanic or take your car into a professional service center for assistance.
Examining the Voltage Regulator in Your Honda:
The voltage regulator is a vital component of your Honda’s charging system. It maintains an optimal level of electrical charge to keep your vehicle running smoothly. Here are some steps on how to examine it:
1. Locate the Voltage Regulator
- Typically found attached to the alternator
- Some models may have it under the hood or near the battery
2. Check for Physical Damage
- Look for any visible signs of damage such as burns, bulges, or cracks
- Damages could indicate that replacement is necessary
3. Test Using a Multimeter
Use this table as a guide when testing with a multimeter:
| Condition | Reading |
|---|---|
| Engine off | 12.5 – 12.6 V |
| Idle speed | >13 but <14 V |
Remember, if readings are outside these ranges, you might need professional help.
4: Consult Professional Help If Needed
Don’t hesitate to seek expert assistance especially when dealing with complex electrical components like voltage regulators.
Replacing the Battery on Your Honda:
Replacing a Honda’s battery is pretty straightforward. Just follow these steps:
Tools Required:
- Wrench Set
- Wire Brush
- Gloves and safety goggles
| Step | Tool Needed |
|---|---|
| Disconnect battery | Wrench set |
| Remove old battery | Hands/gloves |
| Clean terminals | Wire brush |
Note:
Always wear gloves and safety glasses when handling batteries due to risk of acid burns.
Purchasing New Battery
When buying a new battery for your Honda, consider its Cold Cranking Amps (CCA) rating and ensure that it fits within your specific model’s requirements.
Installation of New Battery
It is simply reverse process of removing:
- Place new battery in holder
- Connect Positive (+) terminal first
- Lastly attach Negative (-) terminal
And you’re done! Start up your Honda to see if “Check Charge System” warning has disappeared after replacing the faulty system component; namely – an old car battery.
Fixing Common Charging System Problems in a Honda:
If you’re seeing a “Check Charge System” alert on your Honda’s dashboard, don’t panic. It may just indicate an issue with the charging system which can usually be fixed easily. Here are some common fixes:
- Battery Check: First things first, check the battery condition. Look for signs of corrosion or leakage around the terminals.

- Alternator Test: The alternator charges your battery when the car is running. If it’s not working correctly, it could trigger the warning light.
- Circuit Inspection: Inspect all wiring and fuses related to your vehicle’s charging system. Broken wires or blown fuses could be causing problems.
Follow these steps to diagnose and fix issues:
- Start by testing your battery using a voltmeter.
- If everything looks good, move onto checking your alternator belt for any wear and tear.
3 .Finally inspect electrical circuitry associated with charging system.
| Step | Component | Action |
|---|---|---|
| 1 | Battery | Test with Voltmeter |
| 2 | Alternator Belt | Check Wear & Tear |
| 3 | Circuit | Visual Inspection |
Remember: Always consult with a professional if you’re unsure about performing these checks yourself!
Conclusion and final thoughts
We’ve now unraveled the mystifying “Check Charge System” warning in your Honda. The alert is not just a minor inconvenience, it’s an urgent message from your car that something is wrong with its charging system.
Don’t ignore this; make sure to address these issues promptly to avoid further complications.
You can tackle some of these problems yourself using our suggested methods. However, if you’re unsure or if the problem persists, consider seeking professional help.
Remember: prevention is better than cure—regular maintenance and checks will ensure your vehicle stays in top shape for longer.
Latest Posts:
- Can WD-40 Remove Scratches on Cars? (Hint: Yes, but…)

- Can You Use a Drill to Polish Your Car? (We Tried it Out!)

- Should You Cover Car Scratches With Stickers? (REVEALED!)

- Buick Service Stabilitrak: (Causes & 100% Guaranteed Fix!)
- Common Holden Trax Problems (Causes & 100% Proven Fixes!)

- Jeep Commander Transmission Over Temp: (Guaranteed Fix!)

Leave a Reply