Honda CR-V Rattling Noise When Idling: (5 Issues 100% Fixed!)
Author:
Jack Oliver
Affiliate Disclaimer
As an affiliate, we may earn a commission from qualifying purchases. We get commissions for purchases made through links on this website from Amazon and other third parties.
Are you experiencing a rattling noise when your Honda CR-V is idling? Don’t worry, you’re not alone. Many CR-V owners have reported this issue, and it can be quite frustrating.
In this article, we will explore the possible causes of the rattling noise and provide some solutions to help you resolve this Honda CR-V Rattling Noise When Idling.
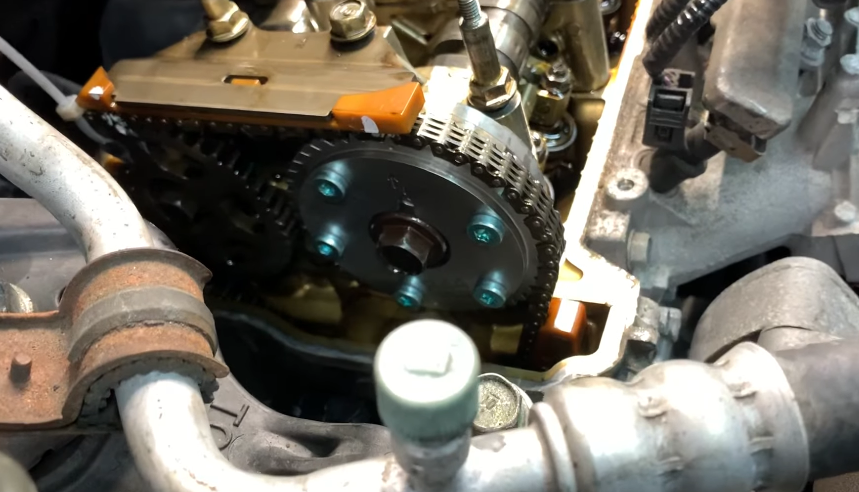
There are several potential reasons why your Honda CR-V is making a rattling noise when idling. It could be due to a loose heat shield, worn-out engine mounts, or a faulty exhaust system. Additionally, issues with the timing chain or the variable valve timing system could also be the culprits.
So, let’s dive into the details and find out how you can put an end to this irritating sound in your Honda CR-V.
Table of contents
Common Causes of Rattling Noise in Honda CR-V:
If you’re experiencing a rattling noise when your Honda CR-V is idling, it can be quite concerning.
While it’s always best to have a professional mechanic diagnose the issue, there are a few common causes that could be behind this annoying noise. Let’s take a closer look at what they are:
Loose heat shields: Heat shields are designed to protect the components under your CR-V’s hood from excessive heat. However, over time, they can become loose or corroded, leading to a rattling noise. Inspect the heat shields and ensure they are securely fastened.
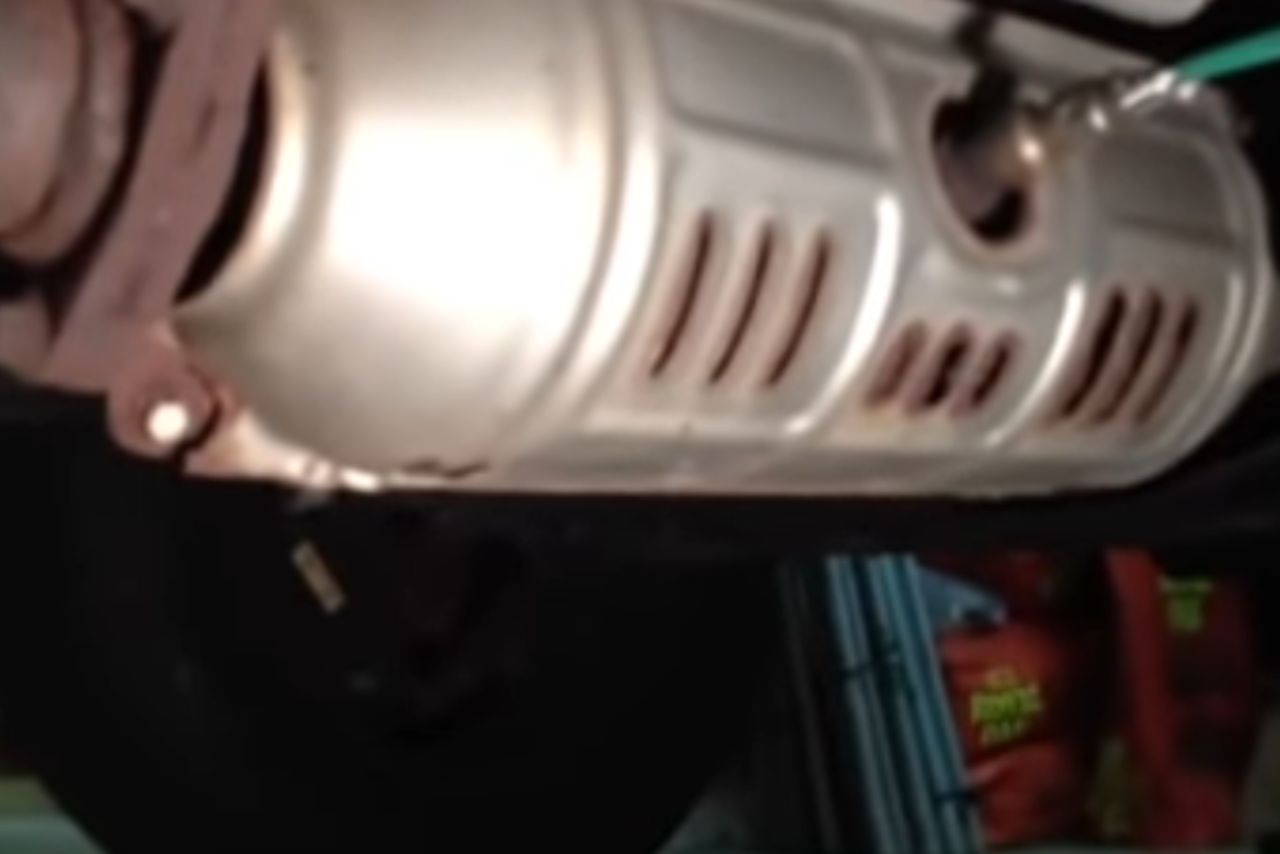
Exhaust system issues: A faulty or loose exhaust system can also cause rattling when your CR-V is idling. Check for any damaged or loose parts, including the catalytic converter, muffler, or exhaust pipe.
Worn-out engine mounts: The engine mounts provide stability and minimize vibrations. If they’re worn-out or damaged, the engine may vibrate more than usual, resulting in a rattling noise. Have a mechanic inspect and replace any worn-out engine mounts if needed.
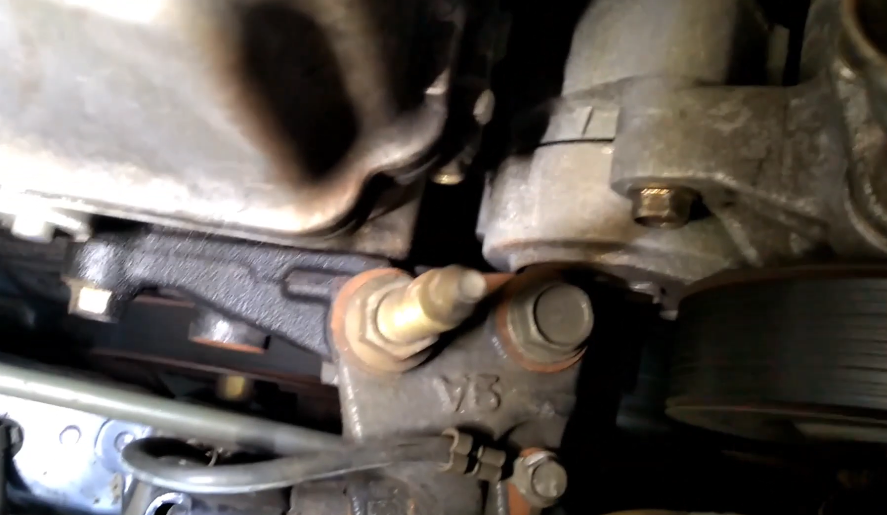
Faulty pulleys or belts: A loose or worn-out pulley or belt can create a rattling noise when your CR-V is idling. Check the condition of the serpentine belt and its tensioner, as well as other pulleys such as the alternator or power steering pump. Replace any faulty components as necessary.
Remember, these are just a few common causes of rattling noise in a Honda CR-V when idling. It’s always recommended to have a qualified mechanic inspect your vehicle for an accurate diagnosis and proper repairs.
Checking the Exhaust System for Rattling:
One of the common sources of rattling noise in a Honda CR-V when idling is the exhaust system. This section will guide you on how to check the exhaust system to identify any potential issues causing the rattling noise.
Inspect the exhaust components: Start by visually inspecting the exhaust system components for any signs of damage or loose connections. Look for rust, cracks, or any parts that appear to be hanging or out of place.
Tighten the exhaust clamps: If you notice any loose connections or clamps, use a wrench to securely tighten them. Loose clamps can cause the exhaust system to rattle, so ensuring a tight fit is crucial.
Check the heat shields: The heat shields on the exhaust system are designed to protect nearby components from excessive heat. However, they can sometimes become loose and cause rattling noises. Gently tap on the heat shields and listen for any rattling sounds. If you detect any movement or noise, it may indicate that the heat shields need to be tightened or replaced.
Inspect the muffler: The muffler plays a significant role in reducing noise from the exhaust system. Check for any cracks or damage that may affect its functionality. A damaged or worn-out muffler can lead to rattling noises.
Examine the catalytic converter: The catalytic converter helps reduce harmful emissions. Inspect it for any signs of damage or rattling. If you suspect a problem with the catalytic converter, it’s best to have it inspected by a professional.
Seek professional assistance: If you’ve gone through the above steps and are still experiencing rattling noises from the exhaust system, it’s recommended to consult a certified mechanic. They have the expertise and necessary equipment to diagnose and address any exhaust system issues effectively.
Remember, proper maintenance and regular inspections can help prevent and identify problems early on.
Use a wrench to securely tighten any loose clamps.
3. Check the heat shields
Tap on the heat shields to detect any rattling sounds. Tighten or replace as needed.
4. Inspect the muffler
Look for cracks or damage that may affect its functionality.
5. Examine the catalytic converter
Check for damage or unusual rattling. Consult a professional if necessary.
By following these steps, you can diagnose and address potential issues with the exhaust system, helping to eliminate the rattling noise in your Honda CR-V when idling.
Inspection of the Engine Mounts:
When it comes to diagnosing a rattling noise in your Honda CR-V while idling, one area that you should definitely inspect is the engine mounts.
Engine mounts play a crucial role in securing the engine to the chassis and minimizing vibrations. Over time, these mounts can wear out or become damaged, leading to a rattling noise when the engine is running at idle.
Here are a few key things to consider when inspecting the engine mounts:
Visual Inspection: Start by visually inspecting the engine mounts for any visible signs of wear or damage. Look for cracks, tears, or excessive movement in the mounts. Pay close attention to the rubber components as they can deteriorate over time.
Physical Inspection: Next, perform a physical inspection by gently shaking the engine to check for any excessive play or movement. Use caution while doing this and ensure the vehicle is securely supported. Excessive movement could indicate a damaged or worn-out mount.
Mount Bolts Tightness: Check the tightness of the mount bolts. Loose bolts can lead to increased vibration and rattling noises. Ensure that all bolts are securely fastened according to the manufacturer’s specifications.
Mount Replacement: If you notice any signs of wear or damage during the inspection, it may be necessary to replace the engine mounts. Consult with a qualified mechanic or refer to your vehicle’s service manual for detailed instructions on replacing the mounts.
Remember, proper diagnosis of the rattling noise is essential before proceeding with any repairs.
If you’re unsure about inspecting or replacing the engine mounts yourself, it’s always best to consult with a professional technician who has experience with Honda CR-Vs.
Key Points
– Visually inspect the mounts for wear or damage.
– Check for excessive play or movement.
– Tighten mount bolts to the manufacturer’s specifications.
– Consider replacing worn-out or damaged mounts.
By following these inspection steps, you can identify if the engine mounts are the source of the rattling noise in your Honda CR-V at idle.
Examining the Heat Shields:
When it comes to diagnosing a rattling noise in your Honda CR-V when idling, one of the potential culprits could be the heat shields.
These thin metal plates are designed to protect the undercarriage of your vehicle from excessive heat generated by the exhaust system.
However, over time, heat shields can become loose or corroded, resulting in an annoying rattling sound.
Let’s take a closer look at how to examine these heat shields and address the issue.
Visual Inspection: Start by visually inspecting the heat shields underneath your CR-V. Look for any signs of damage, such as rust, cracks, or loose bolts. Pay close attention to areas where the heat shields come into contact with other components, as these points are more prone to wear and tear.
Tapping Test: With the engine off and the car cooled down, gently tap on the heat shields using a rubber mallet or a similar object. Listen for any rattling or metallic sounds. If you hear a distinct rattling noise, it’s a clear indication that the heat shields are loose and need attention.
Tightening Loose Bolts: If you discover loose bolts during your visual inspection, tighten them securely using the appropriate tools. Be careful not to overtighten, as this can cause damage to the heat shields or other components.
Replacing Damaged Shields: In cases where the heat shields are severely corroded or damaged, replacement may be necessary. Consult your vehicle’s manual or seek professional assistance to ensure proper installation.
Remember, while examining the heat shields is an important step in addressing the rattling noise issue, it’s always recommended to have a qualified mechanic inspect and diagnose the problem thoroughly.
They have the expertise and tools to identify any underlying issues and provide appropriate solutions.
Tips
– Visually inspect the heat shields for any damage.
– Gently tap on the shields to check for rattling sounds.
– Tighten loose bolts securely without overtightening.
– Consider replacing severely corroded or damaged shields.
By examining the heat shields and taking the necessary steps to address any issues, you can potentially eliminate the rattling noise and restore a quieter and more enjoyable driving experience in your Honda CR-V.
Investigating Loose Components:
When it comes to a rattling noise in your Honda CR-V when idling, one possible cause could be loose components within the engine or other parts of the vehicle.
These loose components could be anything from loose bolts to worn-out parts. Here are a few things you can investigate:
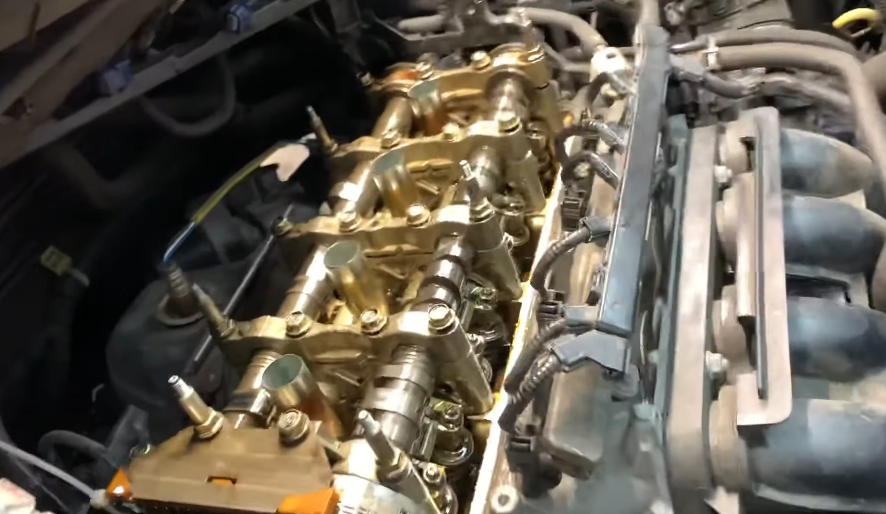
Check the engine bay: Open the hood and visually inspect the engine bay. Look for any loose or disconnected parts, such as hoses, belts, or brackets. Pay close attention to areas around the engine where components are attached.
Examine the exhaust system: A loose or damaged exhaust system can also create rattling noises. Inspect the exhaust pipes, muffler, and catalytic converter for any signs of damage or loose connections. Tighten or replace any components as necessary.
Inspect the heat shields: Heat shields are designed to protect various components from excessive heat. Over time, these shields can become loose or damaged, leading to rattling noises. Check for loose or corroded heat shields, especially around the exhaust system, and secure or replace them if needed.
Listen for specific locations: Pay attention to the location of the rattling noise. Is it coming from the front, back, or sides of the vehicle? This can help pinpoint the source of the problem and guide your investigation.
Don’t forget the interior: While most rattling noises come from under the hood or under the vehicle, it’s worth checking the interior as well. Loose items like coins, keys, or even loose trim pieces can create rattling noises when the car is idling. Remove any loose items and secure any loose interior components.
Addressing the Idle Air Control Valve:
When it comes to addressing the rattling noise in your Honda CR-V when idling, one component that could be the culprit is the idle air control valve (IAC valve). This valve plays an important role in regulating the amount of air entering the engine while the car is idling.
If it becomes dirty or faulty, it can cause the engine to vibrate and produce a rattling noise. Here are a few things to consider when dealing with the IAC valve issue:
Cleaning the IAC valve: In some cases, the rattling noise can be resolved by simply cleaning the IAC valve. Over time, carbon deposits and dirt can accumulate, affecting its performance. To clean it, you’ll need to locate the valve (usually attached to the throttle body) and use an appropriate cleaner. Follow the manufacturer’s instructions and be careful not to damage the delicate parts.
Inspecting for damage: If cleaning the IAC valve doesn’t solve the issue, it’s important to inspect it for any signs of damage or wear. Look for cracks, loose connections, or broken components. If you notice any problems, replacing the valve may be necessary.
Seeking professional help: While cleaning or replacing the IAC valve can be done by car owners with some mechanical know-how, it’s always a good idea to consult a professional mechanic. They have the experience and tools to diagnose the exact cause of the rattling noise and provide appropriate solutions.
Remember, the IAC valve is just one potential cause of a rattling noise when idling in a Honda CR-V. Other factors, such as loose belts, worn-out engine mounts, or exhaust system issues, can also contribute to the problem.
– Clean the IAC valve to remove carbon deposits and dirt.
– Inspect the valve for any signs of damage or wear.
– Consider seeking professional help for diagnosis and repair.
Conclusion and final thoughts 💭
The rattling noise when idling in a Honda CR-V can be a frustrating issue for owners.
While it may not necessarily indicate a serious problem, it’s still important to address the source of the noise to prevent any potential long-term damage to the vehicle.
Here are a few key takeaways to keep in mind when dealing with a rattling noise issue in your Honda CR-V:
Identify the source: The first step in resolving the rattling noise is to pinpoint its source. It could be anything from loose components in the engine bay to a worn-out exhaust system. Take the time to inspect the vehicle thoroughly or consult a professional mechanic for assistance.
Regular maintenance: Maintaining a regular maintenance schedule is crucial in preventing and addressing issues like rattling noises. Ensure that your Honda CR-V is up to date on oil changes, filter replacements, and other routine maintenance tasks. This can help catch any potential issues early on.
Professional opinion: If you’re unsure about the cause of the rattling noise or are unable to resolve it yourself, it’s always a good idea to seek the advice of a professional mechanic. They have the expertise and experience to diagnose the problem accurately and provide the necessary repairs.
Budget for repairs: Depending on the severity and complexity of the rattling noise issue, it may require some repairs or part replacements. It’s important to budget for these potential expenses and be prepared to invest in the necessary repairs to ensure the longevity and performance of your Honda CR-V.
Remember, every vehicle is unique, and while the rattling noise might be a common issue in Honda CR-Vs, the specific cause can vary.
By following these steps and staying proactive in addressing the issue, you can enjoy a quieter and smoother driving experience in your Honda CR-V.
Key Takeaways
– Identify the source of the rattling noise.
– Maintain a regular maintenance schedule.
– Seek a professional opinion if needed.
– Budget for potential repairs or part replacements.
Jack Oliver, is a car enthusiast with a keen eye for choosing the perfect accessories for cars and conducting thorough testing of various automotive products. Jack’s expertise lies in exploring the world of oils, lubricants, additives, and other accessories that enhance the performance, aesthetics, and overall driving experience.

Leave a Reply