Oil Drain Plug Stuck: How To Remove a Stuck Oil Drain Plug?
Author:
Jack Oliver
Affiliate Disclaimer
As an affiliate, we may earn a commission from qualifying purchases. We get commissions for purchases made through links on this website from Amazon and other third parties.
Oil Drain Plug Stuck: Is your oil drain plug giving you a hard time? Don’t worry, we’ve got you covered. Dealing with a stuck oil drain plug can be frustrating, but it’s a common issue that many car owners face.
The oil drain plug can get stuck due to rust, over-tightening, or a damaged thread. To remove it, try using penetrating oil, a breaker bar, and proper socket size.
In this article, we’ll explore the reasons why an oil drain plug gets stuck and provide some handy tips on how to loosen it without causing any damage.
Whether you’re a DIY enthusiast or simply looking to understand more about this pesky problem, read on to find out everything you need to know about dealing with a stubborn oil drain plug.
Table of contents
Causes of a Oil Drain Plug Stuck:
There are several reasons why an oil drain plug may become stuck. Understanding these causes can help you prevent and address this issue effectively:
Over-tightening: When the oil drain plug is tightened excessively, it can be difficult to remove. This commonly occurs when using excessive force or not following the manufacturer’s recommended torque specifications.
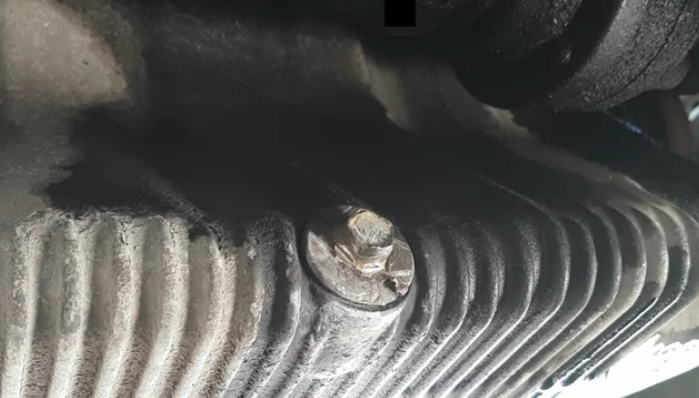
Corrosion: Over time, rust and corrosion can develop on the threads of the oil drain plug and its mating surface on the oil pan. This corrosion makes it harder to loosen the plug.
Debris accumulation: Dirt, debris, and sludge can accumulate around the oil drain plug over multiple oil changes. If not cleaned properly, this buildup can cause resistance when trying to remove the plug.
Sealant or adhesive use: Some individuals apply sealants or adhesives such as thread lockers to prevent leaks from occurring at the connection point between the drain plug and pan. While these products serve their purpose, they can make removing a stuck drain plug more challenging if applied excessively or improperly.
Heat expansion/contraction: Repeated heating cycles during engine operation can cause metal components like the oil pan and drain plugs to expand and contract unevenly over time, leading to increased friction between mating surfaces.
Lack of maintenance: Neglecting regular maintenance intervals for changing your vehicle’s engine oil could result in a longer duration since last removal of an old/dirty/oil-soaked gasket causing them becoming stuck together.
By understanding these potential causes behind a stuck oil drain plug, you’ll be better equipped to troubleshoot and resolve this common issue efficiently while avoiding any unnecessary complications.
Tools Needed to Remove a Stuck Oil Drain Plug:
To successfully remove a stuck oil drain plug, you will need the following tools:
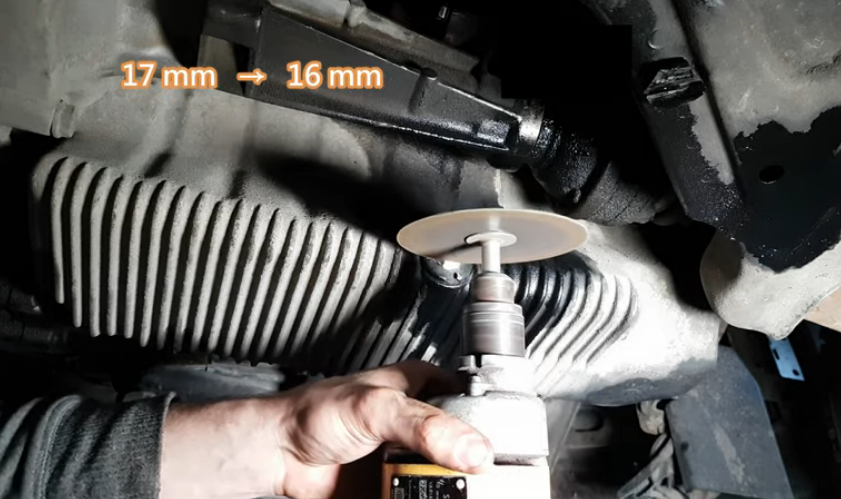
Socket Wrench Set: A socket wrench set with various sizes of sockets is essential for loosening and removing the oil drain plug. Make sure you have the correct size socket that fits snugly onto the plug.
Breaker Bar: In case the oil drain plug is extremely tight or seized due to rust or over-tightening, a breaker bar can provide extra leverage to loosen it. The longer handle of a breaker bar allows for increased torque, making it easier to break free stubborn plugs.
Rubber Mallet: If the oil drain plug seems stuck after applying force with your wrench, gently tapping it with a rubber mallet can help dislodge any debris or corrosion that may be causing resistance.
Pliers: Sometimes, when conventional methods fail, using pliers like tongue-and-groove or locking pliers can provide an alternative grip on the drain plug for removal.
Safety Gloves: It’s crucial to protect your hands while working on your vehicle’s undercarriage. Wear safety gloves that offer good grip and shield against sharp edges and hot surfaces during this task.
Remember, before attempting any repairs involving your vehicle’s engine oil system, ensure you have proper knowledge about car maintenance procedures or consult a professional mechanic if needed.
Step-by-Step Guide: How to Remove a Stuck Oil Drain Plug?
Removing a stuck oil drain plug can be frustrating, but with the right steps and tools, it can be done. Here’s a step-by-step guide to help you through the process:
Gather the necessary tools:
Before you begin, make sure you have these essential tools handy:
Loosen surrounding components: If there are any parts obstructing access to the oil drain plug, such as skid plates or shields, remove them using appropriate tools.
Spray penetrating oil: Spray penetrating oil generously onto the stuck drain plug and surrounding area. Allow it to sit for a few minutes to penetrate and loosen any rust or debris.
Select an appropriate tool: Depending on your vehicle’s make and model, use either a wrench or socket set that fits snugly over the drain plug.
Apply steady pressure: Place the wrench/socket onto the drain plug and apply steady pressure counterclockwise (lefty loosey) while ensuring proper grip of both tool and plug.
Use additional leverage if needed: If initial attempts fail, attach a breaker bar or cheater pipe onto your wrench/socket handle for extra leverage but be careful not to apply excessive force that could damage anything.
Tap gently with rubber mallet: Lightly tap around the edges of the drain plug with a rubber mallet to further aid in loosening any corrosion buildup.
Heat application (optional): As a last resort for particularly stubborn plugs, carefully heat up only around the drain plug area using a heat gun or propane torch. Be cautious not to overheat or ignite any flammable components.
Replace drain plug if necessary: Once removed, inspect the drain plug for damage or excessive wear. If needed, replace it with a new one before reinstalling.
Remember, safety should always be your top priority when working on vehicles. If you encounter significant difficulties removing a stuck oil drain plug, consider seeking professional assistance from a mechanic to avoid causing further damage.
Preventive Measures for Avoiding a Stuck Oil Drain Plug:
To avoid the frustration and inconvenience of dealing with a stuck oil drain plug, there are several preventive measures you can take. By following these simple tips, you can ensure smooth oil changes without any hassles:
Regular Maintenance: Stay on top of your vehicle’s maintenance schedule by changing the engine oil at recommended intervals. Regularly scheduled oil changes help prevent sludge buildup and maintain optimal performance.
Use High-Quality Tools: Invest in high-quality tools such as a socket wrench or an adjustable wrench specifically designed for removing oil drain plugs. These tools offer better grip and torque, making it less likely for the plug to become stuck.
Apply Anti-Seize Compound: Before reinstalling the drain plug during an oil change, apply a thin layer of anti-seize compound to the threads. This will create a protective barrier against corrosion and make future removal easier.
Avoid Over-Tightening: When reinstalling the drain plug, be careful not to over-tighten it as this can lead to thread damage and increase the chances of it getting stuck next time. Follow your vehicle manufacturer’s recommended torque specifications.
Check Washer Condition: Inspect the washer or gasket that seals the drain plug each time you change your vehicle’s oil. If it shows signs of wear or is damaged, replace it with a new one before tightening.
Clean Threads Thoroughly: Before reinstallation, make sure both the drain plug threads and those in the pan are clean from debris or old sealant remnants that could hinder proper sealing or cause sticking in subsequent changes.
Consider Routine Inspections: Periodically inspect your vehicle’s undercarriage for signs of rust or damage near where the oil pan is located – especially if you live in areas prone to road salt exposure or harsh weather conditions like extreme cold. Addressing these issues promptly can prevent future complications.
By following these preventive measures, you can significantly reduce the risk of encountering a stuck oil drain plug during your routine oil changes.
Taking proper care and using the right tools will ensure that this simple maintenance task remains hassle-free.
Common Mistakes to Avoid When Dealing with a Stuck Oil Drain Plug:
Dealing with a stuck oil drain plug can be frustrating, but it’s important to handle the situation carefully to avoid causing further damage. Here are some common mistakes you should avoid when facing this issue:
Using excessive force: It may be tempting to apply brute force or use tools like pliers or hammers to loosen the stuck drain plug. However, this can lead to stripped threads or even breakage of the plug itself. Instead, focus on using proper techniques and tools designed for removing stubborn plugs.
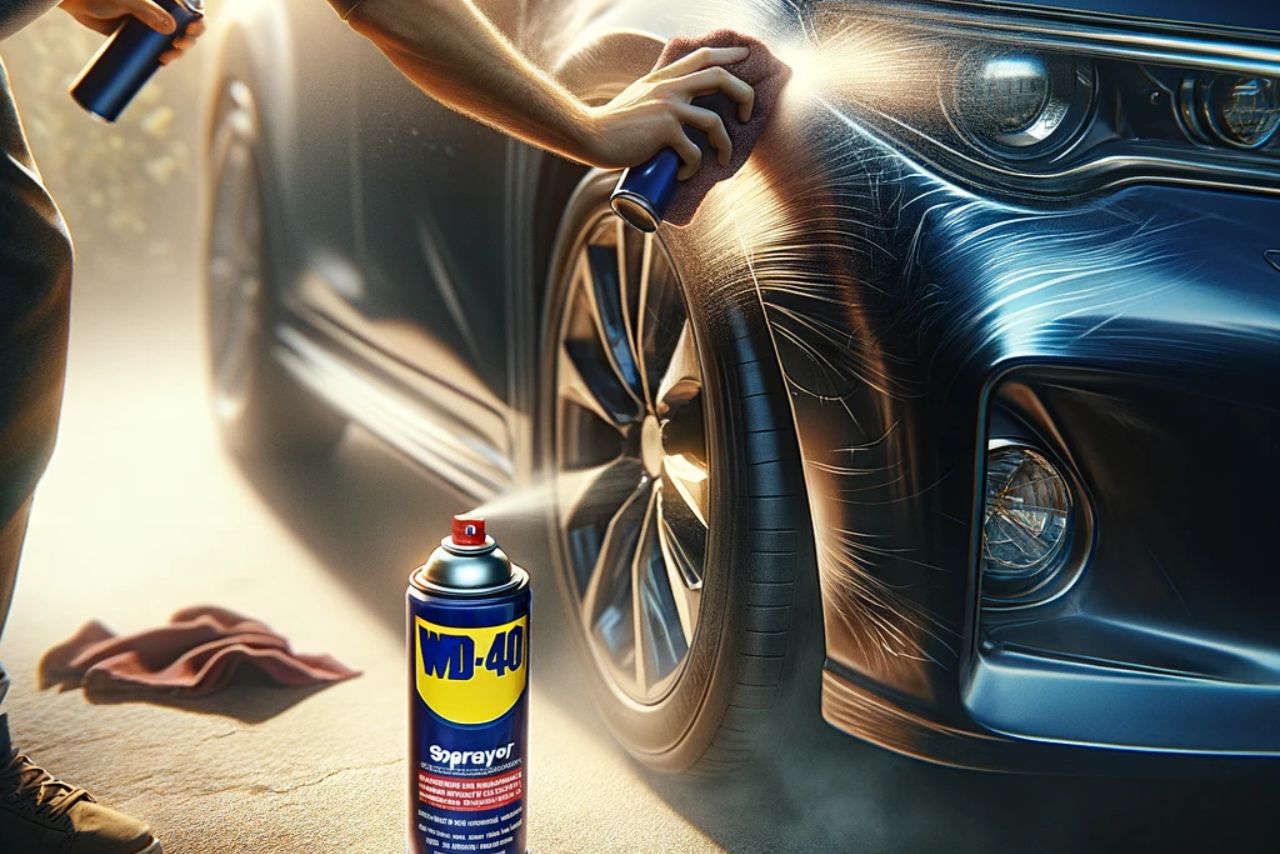
Neglecting lubrication: Lubricating the area around the oil drain plug is crucial for smooth removal. Applying penetrating oil such as WD-40 or PB Blaster and allowing it time to work its magic can significantly ease the process. Ensure that all surrounding areas are well-lubricated before attempting any removal methods.
Using incorrect tools: Using improper tools can worsen the situation and increase your chances of damaging both the drain plug and its housing threads. Always use a properly sized wrench or socket specifically designed for loosening oil drain plugs.
Forgetting safety precautions: Safety should always be a priority when working under your vehicle. Before attempting any repairs, make sure you park on level ground, engage emergency brakes, and use jack stands if necessary for added stability.
Failing to clean debris: Over time, dirt and debris can accumulate around the oil pan and cause difficulties when removing a stuck drain plug. Thoroughly clean the area before attempting any extraction methods to prevent contaminants from falling into your engine during removal.
Ignoring professional help: If you’ve tried multiple methods without success or feel unsure about tackling this task yourself, don’t hesitate to seek assistance from a qualified mechanic who has experience dealing with stuck oil drain plugs.
Remember, patience is key when dealing with a stuck oil drain plug.
By avoiding these common mistakes and following proper procedures, you can increase your chances of successfully removing the plug without causing further damage.
Conclusion and final thoughts 💭
Dealing with a stuck oil drain plug can be frustrating and time-consuming. However, by following the steps outlined in this article, you can successfully remove a stuck oil drain plug without causing any further damage to your vehicle.
Remember to take your time and use the appropriate tools for the job.
Applying penetrating oil, using a breaker bar or socket wrench with sufficient leverage, and exercising caution when applying force are all crucial steps in loosening a stubborn oil drain plug.
If all else fails and you’re still unable to remove the stuck plug on your own, it’s best to seek professional help from a mechanic or automotive expert.
They will have the necessary experience and tools to safely resolve this issue for you.
Jack Oliver, is a car enthusiast with a keen eye for choosing the perfect accessories for cars and conducting thorough testing of various automotive products. Jack’s expertise lies in exploring the world of oils, lubricants, additives, and other accessories that enhance the performance, aesthetics, and overall driving experience.


Leave a Reply