
The first apartment I ever rented, I spent my entire first night hanging a gallery wall with regular nails because I was too excited to wait. Three weeks later I read my lease properly, found the paragraph about wall damage, and spent a Saturday with a tub of spackle and a paint chip I could not match. I lost $75 of my deposit anyway.
That’s the whole reason this move-in day decorating checklist exists.
Here’s the thing about moving into a rental: the first 48 hours decide a lot. What you photograph, what you ask your landlord, and what you stick to the walls (or very carefully don’t) will either protect your security deposit or quietly drain it a year from now.
And you’re tired, surrounded by boxes, and probably eating takeout off a moving box, so nobody is thinking about this stuff.
So this is the order I’d do things in if I were moving into a new rental tomorrow. It’s built for 2026 renters: smaller floor plans, stricter landlords, and a lot more peel-and-stick options than I had a few years ago.
I’ll cover what to do before you unpack, what to buy first, what to decorate on day one versus week two, and what to skip entirely.
Your Move-In Day Decorating Checklist at a Glance
If you only skim one section, make it this one. Details for each step are below.
- Photograph and document everything before you move a single box in.
- Reread your lease for the decorating rules (paint, nails, adhesives, flooring).
- Get permission in writing for anything you’re unsure about.
- Deal with lighting, window coverings, and privacy first.
- Set up your basic storage and entry zone.
- Hang things damage-free using the right adhesive for each surface.
- Add removable upgrades: rugs, peel-and-stick, hardware swaps (kept in a labeled bag).
- Save a “move-out kit” folder so you can restore everything later.
Step 1: Document the Apartment Before You Unpack Anything
This is the least glamorous step and the most valuable one. Your move-in inspection is the baseline your landlord compares against when you leave, so anything you don’t record can be blamed on you.
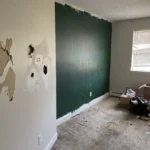
Walk through every room with your phone before the boxes arrive. Take wide shots of each wall, then close-ups of anything imperfect: scuffs, old nail holes, scratches on floors, chipped tile, stained grout, cracked outlet covers, and the inside of closets and the oven. Open the cabinets. Turn the faucets on. Photograph the ceiling corners for water stains.
I also record a slow 60-second video per room, narrating as I go (“north wall, two nail holes above the window, paint looks scuffed near the baseboard”).
It feels ridiculous and it has settled disputes for me twice. If your landlord gives you a condition checklist, fill it out and email a copy to yourself and the landlord so there’s a timestamp.
Pro tip: Most people photograph damage and forget to photograph the good condition of things. Photograph a clean wall too. If your landlord later claims the paint was “fresh” when you moved in versus “worn,” dated photos of the real state of it help you.
Step 2: Reread Your Lease for Decorating Rules
You skimmed it when you signed. Now read it again with a highlighter, specifically for the sections on alterations, walls, flooring, and fixtures. Most leases fall into one of three camps:
- Strict: No nails, no adhesives of any kind, no paint, and no changes to fixtures.
- Moderate: Small nail holes allowed, no paint, no wallpaper, no changes to lighting or hardware.
- Flexible: Painting allowed with approval (and sometimes with a repaint-before-move-out requirement).
I’ll be real with you: the “no adhesives” clause trips people up more than anything else. A lot of leases that ban nails are fine with removable hooks, but some ban anything that sticks. If that’s your lease, don’t guess. Ask.
Step 3: Get Permission in Writing
Phone calls and “yeah, that’s fine” in the hallway don’t count when it’s time to return a deposit. Send a short, polite email listing what you want to do and ask for a reply. Something like:
“Hi [Name], I just moved into unit [X]. Before I decorate, could you confirm I’m allowed to use removable adhesive hooks and a few small nail holes for picture frames? I’d also like to swap the bathroom light fixture temporarily and put the original back when I move out. Thanks!”
Keep the reply in a folder. A friend of mine, Priya, got a written “yes” to paint her bedroom a soft sage in a Chicago one-bedroom, and when she moved out the landlord tried to charge her for repainting. Her email ended the conversation in about two minutes.
Pro tip: Ask about the thing you really want to do, not the vague version. “Can I decorate?” gets a vague answer. “Can I paint one accent wall and repaint it white when I leave?” gets a clear one.
Step 4: Start With Lighting, Window Coverings, and Privacy
This is where I’d spend my first real decorating dollars, and I’d do it before buying a single throw pillow. Rentals tend to come with harsh overhead lighting and bare windows, and both make a space feel temporary no matter what else you add.
Rental-Friendly Lighting
The fastest upgrade in any rental is warm lamps. Plug-in wall sconces, floor lamps, and table lamps with warm bulbs (look for roughly 2700K on the box) do more for a room than almost any other purchase. If you want to replace a builder-grade overhead fixture, ask permission first, keep the original in a labeled box, and photograph the wiring before you touch it. Or skip the swap entirely and use lamps.
Window Coverings Without Drilling
Tension rods are your friend for curtains, especially inside window frames. Over-the-door and adhesive-mounted curtain rods exist, but be honest about the weight of your curtains: lightweight panels are fine, blackout drapes with a thick lining usually are not.
I tried an adhesive curtain rod with heavy linen curtains and it came down at 2 a.m. in the first week. Return it before you decide to trust it.
If you want privacy but not curtains, static-cling window film is removable, inexpensive, and leaves nothing behind.
Step 5: Set Up Your Entry Zone and Basic Storage
The entry is where clutter starts, and where renters usually have the least built-in storage. Before you decorate anything else, solve the “where do my keys, shoes, and bag go” question, because you’ll use it every single day.
My setup in a 410-square-foot studio is a narrow shoe rack, three adhesive hooks, and a small tray on a console. That’s it, and it works. If you’re setting one up, here’s what I’d consider by space:
| Space type | Best renter-friendly storage | Approx. cost | Trade-off |
|---|---|---|---|
| Tiny entry, no wall space | Slim freestanding shoe rack + over-the-door hooks | $20-$40 | Doors can scuff if too tight |
| Narrow hallway | Adhesive hooks + wall-mounted tray | $15-$30 | Weight limits matter |
| Open studio | Freestanding coat rack + storage bench | $60-$120 | Takes floor space |
| Larger entry | Console table + wall mirror (hung properly) | $100-$250 | Mirror needs correct hanging method |
Pro tip: If your closet is a suggestion, as mine is, buy a tension rod and hang a second rail in the same closet. It doubles your hanging space and removes cleanly.
Step 6: How to Hang Things Without Damaging Walls
This is the part of the move-in day decorating checklist that decides whether you get your deposit back. The right adhesive depends on your wall, so don’t treat all of them as interchangeable.
Check the Wall Surface First
Painted drywall is the easiest surface. Textured walls, brick, tile, and wallpaper are harder, and some paint finishes (especially flat paint) can peel when adhesive strips are removed. Test in a closet corner or behind a door before putting up anything you care about.
Pick the Right Hanging Method
| Hanging method | Best for | Weight guidance | Risk |
|---|---|---|---|
| Adhesive strips (picture hanging) | Lightweight frames, posters | Follow the package limit; I stay well under it | Can peel flat paint |
| Removable adhesive hooks | Keys, towels, light bags, small wreaths | Follow the package limit | Weak on textured walls |
| Small nail or pin | Medium frames | Depends on the wall | Leaves a hole (may be allowed) |
| Over-the-door hooks | Coats, bags, robes | Depends on the door | Can scuff paint |
| Leaning art on shelves or floor | Large mirrors, big art | No wall load | Takes floor or shelf space |
A few details most posts skip. Clean the wall with rubbing alcohol before applying adhesive, and let it dry fully.
Press the strip firmly for about 30 seconds, then wait an hour before hanging anything on it. And remove strips by pulling the tab slowly, parallel to the wall, not straight out, or you’ll peel paint.
For small nail holes, ask whether they’re allowed. In many places, a few small holes are considered normal wear, but that varies by lease and by landlord, so this is exactly where that email from Step 3 earns its keep.
Pro tip: For anything heavy, like a big mirror, the safest renter move is leaning it against the wall on the floor. It looks intentional, it’s now a style, and it can’t fall on your head at night.
Step 7: Removable Upgrades That Actually Make It Look Like Yours
Once the basics are done, this is the fun part. Keep everything reversible and label anything you take down.
Rugs
A rug is the cheapest way to make a rental feel like a home, and it hides a lot of dated flooring.
Use a rug pad (a good one, not the thin kind) so it doesn’t slip, and check that the pad is safe for your flooring type, since some rubber backings can discolor vinyl or finished wood over time.
Peel-and-Stick Wallpaper and Tile
This has gotten much better, but I’d still approach it carefully. Peel-and-stick works best on smooth, fully cured paint. It can be difficult on textured walls, and removal can pull paint if the wall was painted recently.
My advice is to test one small piece in a hidden spot and leave it for a week before committing to an entire wall. For the best results, use it on a small area like the inside of a bookshelf, the back of a closet door, or a kitchen backsplash, rather than a whole room.
Swapping Hardware and Fixtures (Temporarily)
Cabinet knobs, shower heads, and faucet aerators are easy to swap and easy to reverse. Put every original piece in a labeled zip bag, tape it somewhere you’ll find it (inside the cabinet under the sink works), and note it on your move-out kit list.
I once lost a set of original cabinet knobs in a move and it cost me $18 and an apology.
Textiles and Plants
Curtains, throw blankets, bedding, and plants add warmth without touching the walls. If you have pets or a landlord who’s picky about water damage, use saucers under every pot.
Step 8: Build Your Move-Out Kit Now (Yes, Really)
I know, you just moved in. Do it anyway, because it takes ten minutes now and an hour of panic later.
Create a folder (digital and a physical envelope) with:
- Your move-in photos and videos
- The signed lease and any written permissions
- A list of every original item you swapped out and where it’s stored
- Receipts for anything you installed
- The brand of any adhesive you used, so you know how to remove it properly
This is the version of “move in decorating” that nobody puts on Pinterest, and it’s the one that saves money.
How Much Does a Rental Move-In Setup Cost?
Here’s a realistic range for a basic renter-friendly setup in 2026, based on what I’d personally buy first. Prices vary a lot by brand and city, so treat these as ballparks, not promises.
| Item | Budget range | When to splurge |
|---|---|---|
| Warm lamps (2-3) | $30-$90 | If your room has no overhead light at all |
| Tension rods and curtains | $25-$80 | If you need blackout for night shifts |
| Adhesive hooks and strips | $10-$25 | Never; buy name brands you trust here |
| Rug and rug pad | $60-$200 | For large living areas |
| Shoe rack and entry storage | $20-$60 | If you share the space |
| Peel-and-stick (small area) | $20-$60 | If the surface is smooth and in good shape |
If I had to pick one splurge, it would be the rug pad and a decent rug, because I walk on it daily and it changes how the whole room feels.
Common Mistakes New Renters Make on Move-In Day
Decorating before documenting. Photos first, always. Once the couch is in place you can’t unsee (or re-photograph) the scuff behind it.
Assuming “temporary” means “damage-free.” Plenty of removable products still pull paint from the wrong wall. Test first.
Skipping renters insurance. It’s not decoration, but it belongs on every move-in list. It’s usually inexpensive and it covers your belongings if something goes wrong, so it’s worth checking whether your lease even requires it.
Overbuying before you live there. Wait a week or two before buying big furniture or decor for the apartment. You’ll learn where the light actually falls and how you really use the space.
Painting without a plan. Even with permission, ask what color the landlord wants it returned to, and whether you’re expected to repaint when you leave.
What I’d Do First If I Were Starting Over
If I were moving into a new rental tomorrow, I’d photograph every wall before the first box came in, send one honest email about adhesives and nail holes, and put up warm lamps before I bought anything else.
Then I’d give myself two weeks of living there before spending a single dollar on art. The apartment always tells you what it needs, and it’s rarely what you planned in the moving truck.
Be patient, keep everything reversible, and save the email. A good move-in day decorating checklist isn’t about making the place perfect on day one. It’s about making it feel like home without paying for it twice when you leave.

Leave a Reply