
I signed my first lease at 22 without reading a single word of the “alterations” clause, and I found out the hard way three days before move-out that my landlord considered the little cup hooks I’d screwed into the kitchen cabinets “structural damage.” That cost me $60 out of my deposit for four holes smaller than a pencil eraser.
So yeah — I learned rental decorating rules the expensive way, and I’m writing this so you don’t have to.
If you’re staring at a beige box of an apartment right now, wondering how you’re supposed to make it feel like yours without torching your security deposit, you’re in the right place.
Rental decorating isn’t about giving up on style — it’s about knowing which rules are actually rules (lease terms, local tenant law) and which are just habits everyone repeats without checking (“you can never paint a rental,” which, depending on your landlord, is sometimes flat-out false).
I’ve lived in four rentals over the last eight years — a 410-square-foot studio, two shared houses, and the one-bedroom I’m in now — and I’ve made almost every renter decorating mistake there is: the wrong adhesive hooks, wallpaper that ripped drywall paint off with it, a rug pad that stained the carpet underneath. This post is the “rules” I wish someone had handed me before my first lease, organized by the thing most beginners get wrong first.
Rule #1: Read Your Lease’s “Alterations” Clause Before You Buy Anything
This is the single most skipped step in rental decorating, and it’s the one that actually determines what you’re allowed to do.
Most leases have a clause — sometimes called “Alterations,” “Modifications,” or buried in “Tenant Responsibilities” — that spells out what counts as damage versus normal wear and tear.
Here’s why it matters more than any decorating hack: two renters with identical apartments can have completely different rules. My friend Priya’s lease in Chicago explicitly allows nail holes for hanging art (up to a certain size and number) and requires her to just patch and repaint at move-out.
My current lease says no nail holes at all, full stop, patched or not — everything has to be removable. Same city, same building type, totally different rules, because it comes down to what the individual landlord wrote into the contract.
Pro tip: Take a photo of the alterations clause and keep it in your phone’s notes app. When you’re standing in a home goods store deciding between a $12 Command hook and a $4 nail-in hook, you want to be able to check your actual lease language, not your memory of skimming it eight months ago.
If your lease is vague or silent on decorating (a lot of them are), that’s actually your cue to email your landlord and ask directly, in writing, before you do anything — “vague” is not the same as “permission,” and a quick email saves you a deposit dispute later.
Rule #2: Do a Thorough Move-In Walkthrough — With Photos, Not Just Memory
Before you hang a single thing, document the apartment’s existing condition. I mean genuinely thorough: every wall, every appliance, inside cabinets, the underside of blinds, that weird stain on the bathroom ceiling that was definitely already there.
I didn’t do this at my second apartment and got charged $85 for a carpet stain in the closet that I’m 90% sure was there when I moved in — I just had no proof.
At my current place, I took 64 photos and a walkthrough video the day I got the keys, timestamped and backed up to two places. It took maybe twenty minutes total.
This matters for decorating specifically because it protects you when you’re doing things like removing existing curtain rods to swap in your own, or taking down builder-grade light fixtures — you want a clear “before” record so nobody can later claim you damaged something that was already worn.
Rule #3: Learn the Weight Limits of Removable Hanging Products (They’re Lower Than You Think)
This is where most rental decorating actually goes wrong, and it’s rarely about permission — it’s about physics. Command strips, adhesive hooks, and other removable mounting products all have specific weight ratings, and going over them is how you end up with a shattered picture frame on the floor at 2 a.m.
The large Command strips are rated for about 16 pounds per pair, and the mini ones for around 1 pound — that’s fine for a lightweight print but not for a mirror or a shelf with books on it. I learned this when a friend’s macrame wall hanging (heavier than it looked, with a wooden dowel) peeled a strip clean off the wall along with a chunk of the landlord’s paint.
Here’s a comparison of the renter-friendly hanging methods I’ve actually tested, since “which one do I even use” is usually the real question once you know you can’t drill:
| Method | Weight capacity | Wall damage risk | Cost (approx.) | Best for |
|---|---|---|---|---|
| Command strips (large) | Up to ~16 lbs/pair | Low, if removed correctly (slow, downward pull) | $8–14 per pack | Framed art, mirrors under 16 lbs |
| Adhesive hook (small) | 1–3 lbs | Very low | $5–8 per pack | Keys, light string lights, small plants |
| Tension rod | Varies by rod, often 10–30 lbs | None — no adhesive or holes | $10–25 | Curtains, closet dividers, under-sink storage |
| 3M picture-hanging strips | Up to 16 lbs | Low | $6–10 | Slightly textured or heavier walls than standard Command |
| Museum putty/gel | Very light items only, under 1 lb | Low, can leave slight residue | $4–7 | Securing decor items, not hanging weight |
| Nail-in hook (if lease allows) | Highest, 20+ lbs | Highest — leaves a hole | $2–5 | Heavier art, only with written permission |
Pro tip: When you remove a Command strip, pull it slowly and straight down (not out), parallel to the wall — pulling it away from the wall at an angle is what takes the paint with it. This one habit saved me a repaint charge at my last move-out.
Rule #4: “Renter-Friendly” Wallpaper Still Has Rules of Its Own
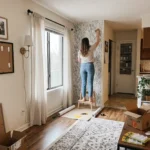
Peel-and-stick wallpaper gets recommended constantly for rentals, and it can genuinely transform a space — but it’s not as foolproof as the product photos make it look, and it has its own set of rules.
The biggest one: it needs a smooth, freshly painted (and fully cured — at least a few weeks old) wall to actually stay up and come off clean. I put peel-and-stick wallpaper on a bathroom wall that still had slightly older, slightly textured builder paint, and about six months in, corners started lifting.
When I finally took it down at move-out, it pulled a thin layer of paint off with it in two spots — not enough to be a huge deal, but enough that I had to touch it up myself before handing back the keys.
The other rule nobody mentions: test a small piece in an inconspicuous spot (inside a closet, behind where furniture will sit) for 48 hours before committing to a whole wall. Paint quality varies a lot between rentals, and what strips clean off one landlord’s walls can rip paint off another’s.
Pro tip: Avoid applying peel-and-stick wallpaper in bathrooms or kitchens with a lot of humidity unless the product specifically says it’s moisture-rated — most standard versions will start curling at the seams within a few months in a steamy shower area.
Rule #5: Know What You Can (and Can’t) Do About Paint
“You can’t paint a rental” is repeated so often that a lot of beginners don’t even bother asking — but plenty of landlords will say yes, especially for a single accent wall, if you agree to either repaint it back to neutral before move-out or leave it (some landlords genuinely don’t mind a tasteful color and skip the repaint requirement).
My roommate Elena asked our landlord for permission to paint our shared living room a soft sage green, expecting a no, and got a yes on the condition that we buy the paint, do the labor, and repaint it back to the original white (which she’d saved a full can of) before we moved out.
That’s a fairly common arrangement — it costs you the price of two paint jobs’ worth of time, but it’s a real option if a color genuinely matters to you.
If painting is a hard no, peel-and-stick paint alternatives and large fabric or vinyl wall panels can fake the effect of a painted accent wall without touching the actual wall surface — they’re pricier per square foot than a can of paint, but they come with zero repaint obligation.
Rule #6: Protect the Floors Before You Add Rugs or Furniture
Area rugs are the easiest way to warm up a rental’s usually-neutral flooring, but the rule most beginners miss is about what goes under the rug, not the rug itself.
Rubber rug pads with a certain type of backing can actually discolor or leave a residue on both hardwood and some vinyl plank flooring over time — I had a rug pad “melt” slightly into a vinyl floor in my second apartment after about a year, leaving a faint grid pattern that cost me part of my deposit.
Now I only use felt-based pads, or the specific “hard floor safe” pads that say so on the packaging, and I still lift and check underneath every few months.
For furniture, felt or silicone furniture pads under anything with hard feet (dressers, bed frames, dining chairs) prevent the scuffs and gouges in flooring that landlords notice immediately at move-out walkthroughs — this one’s cheap (usually under $10 for a whole set) and takes two minutes per piece.
Rule #7: Swapping Light Fixtures Is Possible — But Keep the Originals
A lot of renters don’t realize you’re allowed to swap out an ugly builder-grade light fixture, as long as you keep the original and put it back before you move out.
This is one of the higher-impact, lower-cost rental decorating moves, because lighting affects a room more than almost anything else and most standard fixtures use the same universal mounting bracket.
I swapped the flush-mount ceiling light in my current bedroom for a $45 flush-mount from a home goods site, and kept the original in a labeled box in my closet the entire time I’ve lived here.
It’s a genuinely easy swap if you’re comfortable turning off the breaker first — but this is also the one decorating “rule” where I’d say: if you’re not confident doing basic electrical work safely, it’s worth paying an electrician for a 20-minute job rather than risking it yourself.
Pro tip: Take a photo of the original wiring connections before you disconnect anything, so reinstalling the original fixture at move-out doesn’t turn into a guessing game.
Rule #8: Awkward Layouts Are a Rental Constant — Plan Around Them, Don’t Fight Them
Almost every rental has at least one genuinely bad layout decision baked in — a radiator eating half a wall, a window in a weird spot, a bedroom door that opens directly into where a bed would logically go.
My studio had a load-bearing column basically in the middle of the room, which is not a problem you can decorate your way out of, only around.
The rule here is less about products and more about mindset: measure the room and the “problem” feature first, then shop for furniture, rather than falling in love with a piece and trying to force your existing layout to accommodate it.
A tape measure and a rough floor plan (even just on paper) will save you from the classic rental mistake of buying a couch that’s four inches too long for the space between your window and your hallway entrance.
Rule #9: Keep a “Move-Out Restoration” Folder From Day One
This is the rule that ties everything above together, and it’s the one I wish I’d started doing from my very first lease: keep a running folder — physical or digital — of receipts, before/after photos, and a simple checklist of everything you’ve changed and how to reverse it.
By the time you actually move out, months or years later, you will not remember which wall had the Command strips versus the nail hooks, or which box the original light fixture is in. I keep a note titled “move-out list” on my phone that I add to the same day I make any change — it currently has six items on it, and I’m not moving for another year.
What I’d Do Differently If I Were Starting Over
If I were signing a new lease tomorrow, I’d read the alterations clause the same day I signed, do a real photo walkthrough within 24 hours of getting keys, and buy Command strips and a tension rod or two before I bought a single decorative item — because the “can I hang this” question always comes before the “what should I hang” question, and skipping that order is how deposits disappear.
Rental decorating rules aren’t really about limiting your style — they’re about making sure the version of you moving out gets the deposit back that the version of you moving in was counting on.
Once you know the actual rules (yours, specifically, not the internet’s general assumptions), you’ll find there’s a lot more room to make a rental feel like home than beginners usually expect.
Want this as a downloadable file (Word doc or Markdown) for your workflow, or is pasting straight from here easier for you?

Leave a Reply