
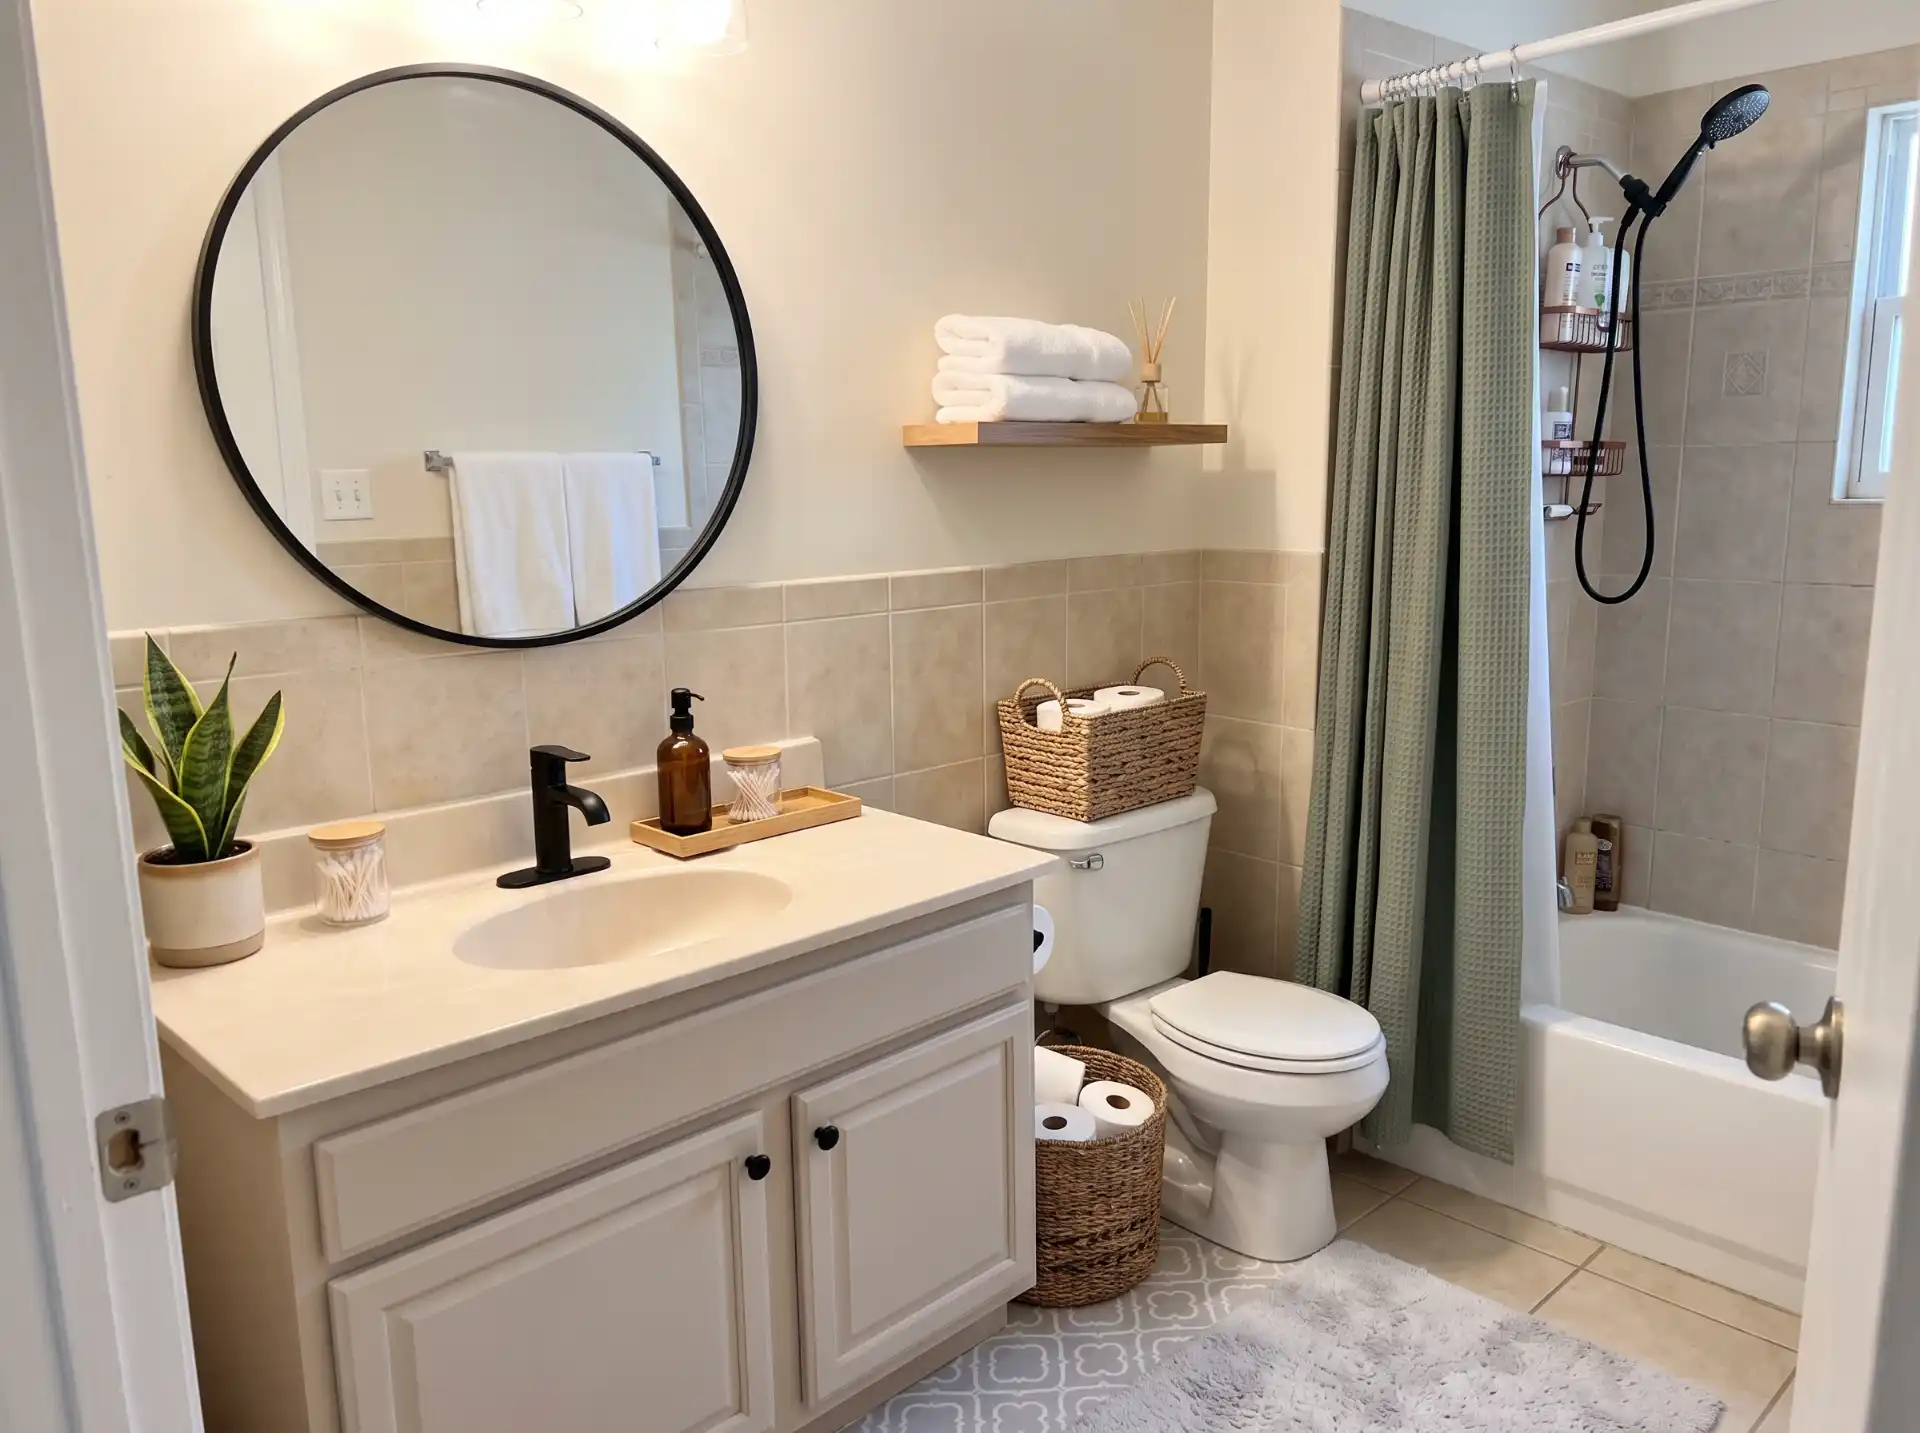
I lived in four rentals in six years before I bought my first place, and every single one of them had a bathroom that looked like it was decorated by someone who actively disliked joy. Builder-beige walls, a mirror the size of a postage stamp, a shower curtain rod that was somehow both flimsy and permanently rusted. I used to think there was nothing to be done about it — you rent, you deal, you get your deposit back at the end.
Then a friend of mine, Priya, showed me her rental bathroom after she’d been in it for about four months, and I genuinely didn’t recognize it. Same tile, same tub, same landlord-grade fixtures underneath — but it looked like a completely different room.
That’s the thing about renter-friendly upgrades: almost none of them touch the actual bones of the bathroom. They’re additions, swaps, and covers that you can undo in an afternoon before your move-out walkthrough.
Some of these cost under $15. A few are bigger investments that only make sense if you’re planning to stay put for a while. I’ve broken this list into categories — storage, hardware swaps, walls and surfaces, lighting, textiles, and a few small-luxury extras — because that’s honestly how most people approach a bathroom refresh: room by room, problem by problem, not all 31 ideas at once.
One quick note before we get into it: always check your lease. Some landlords are fine with adhesive hooks and tension rods but draw a hard line at anything involving drilling, even a single small screw. Others don’t care as long as you patch and repaint before you leave. When in doubt, a quick text to your landlord takes two minutes and saves you a fight over your deposit later.
Storage & Organization Upgrades
Bathroom storage is usually the first thing that makes a rental feel unlivable, because most builder-grade bathrooms give you one medicine cabinet and nowhere else to put anything. These are the fixes that actually solve that problem without a single hole in the wall.
1. Over-the-toilet storage that isn’t wobbly
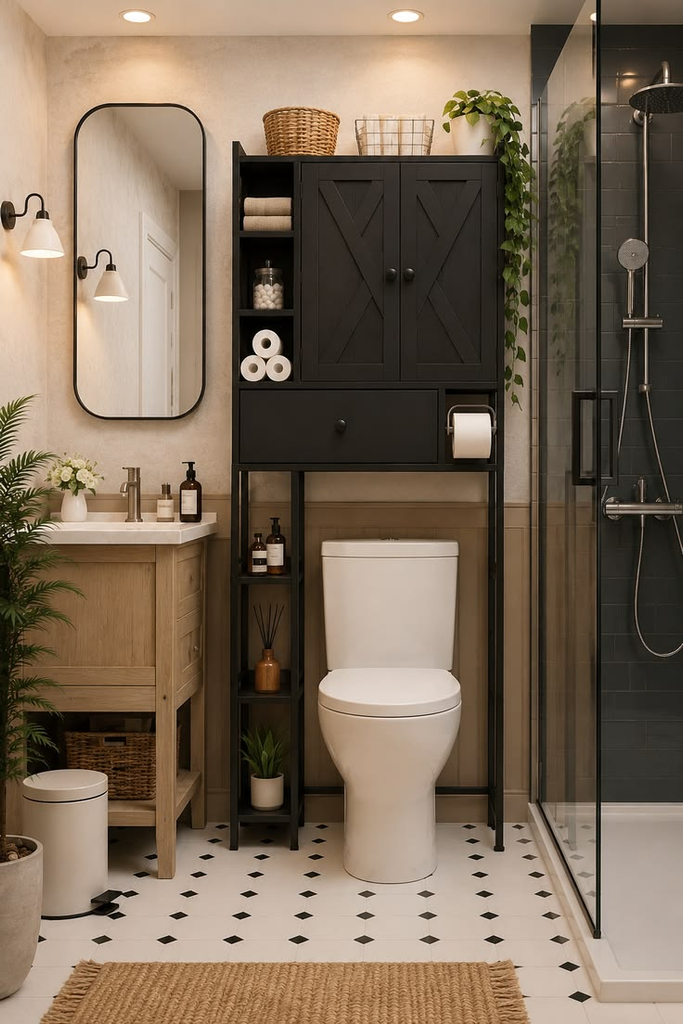
The why: if your bathroom is under 40 square feet — and a shocking number of rental bathrooms are — the space above your toilet tank is the single most wasted square footage in the room.
The how: skip the cheapest particleboard version you’ll find on a big-box shelf. I bought one for $30 in my first apartment and it started leaning within two months because the legs didn’t actually sit flush against my slightly uneven tile floor. The ones with adjustable feet and a ladder-style open-shelf design are more stable and also easier to sell or hand off when you move, since they’re not falling apart.
Pro tip: measure the distance from your toilet tank to the wall before you buy — a lot of these units assume a 6 to 8 inch gap, and older toilets (common in pre-1990s buildings) sometimes sit closer to the wall than that.
2. Adhesive shower caddies instead of tension-rod ones
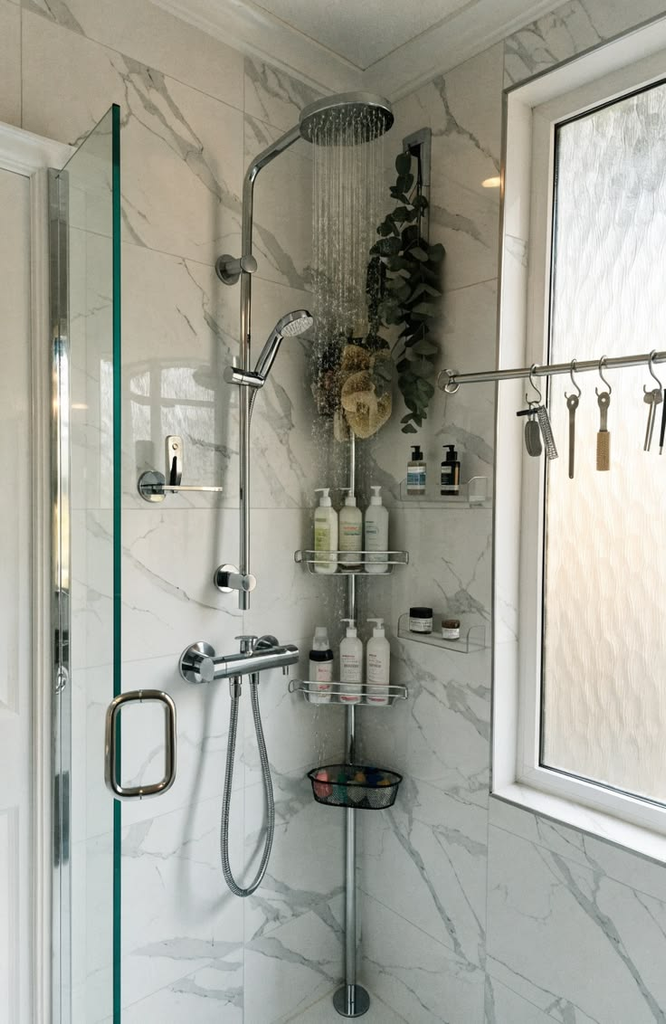
The why: tension-rod caddies rely on pressure against your shower walls, and in a lot of tile or fiberglass rental showers, that pressure either doesn’t hold or it leaves a permanent ring of grime where the rubber feet sit.
The how: command-strip-style adhesive caddies have gotten a lot better in the last few years — the good ones (rated for wet environments specifically, not the general-purpose strips) hold up to 3-4 pounds per hook.
Pro tip: clean the tile with rubbing alcohol before sticking anything up. Soap residue is the number one reason adhesive hooks fail in a shower, and it’s not really about the brand.
3. A rolling bathroom cart
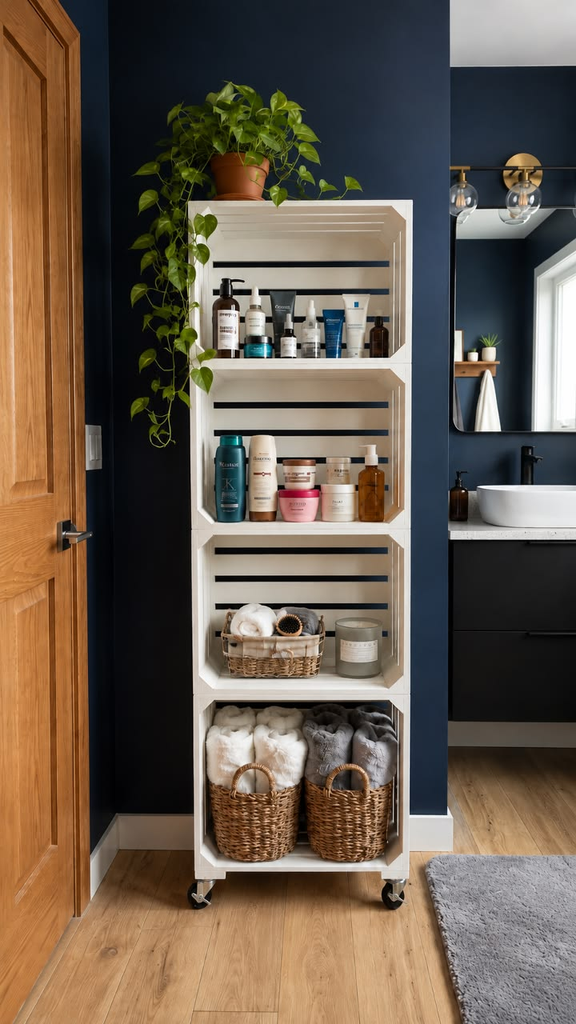
The why: this is the single upgrade I recommend most to people with tiny rental bathrooms, because it’s storage that moves with you and works in literally any layout — narrow gap next to the toilet, corner by the sink, wherever you’ve got a 12-inch strip of floor.
The how: a 3-tier metal cart with wheels holds everything from extra towels to skincare to cleaning supplies, and you can wheel it out of the way when you have guests.
Pro tip: line the bottom bin with a small towel so bottles don’t clink around every time you push it.
4. Corner shelving that clamps, not drills
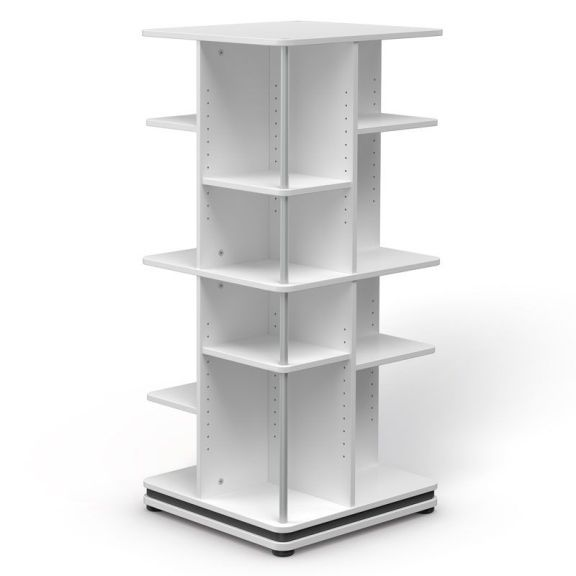
The why: corners are dead space in almost every rental bathroom shower.
The how: tension-pole corner shelves wedge between floor and ceiling instead of attaching to tile, so they hold real weight — shampoo bottles, a razor, a loofah — without a single drilled hole.
Pro tip: get one rated for at least 8 feet of adjustability even if your ceiling seems standard height; older buildings especially can run a few inches taller or shorter than you’d expect, and returning the wrong size is a hassle.
5. Under-sink storage bins
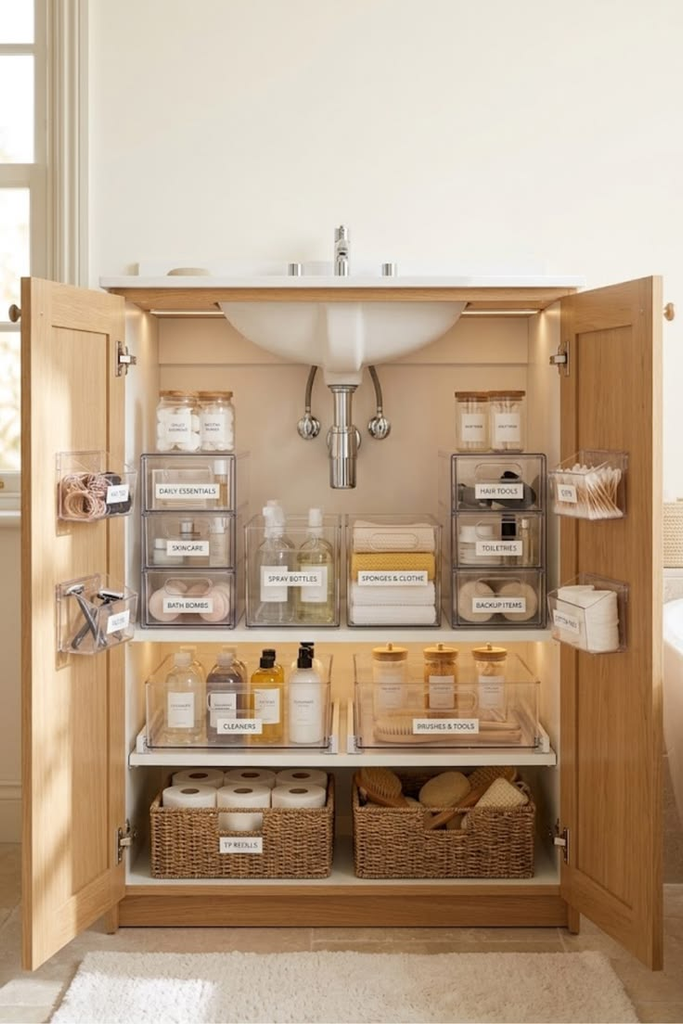
The why: the cabinet under a rental bathroom sink is almost always just an empty box around exposed plumbing, which means anything you put in there tends to fall over or get knocked around every time you reach for something.
The how: stackable bins sized to fit around the pipes turn that wasted space into actual usable storage. Measure the width on both sides of the pipe before buying — most under-sink cabinets aren’t symmetrical.
Pro tip: my roommate in college used a lazy Susan turntable in ours for a while, and it made everything in the back corner actually reachable instead of a lost cause.
6. A door-back organizer with pockets
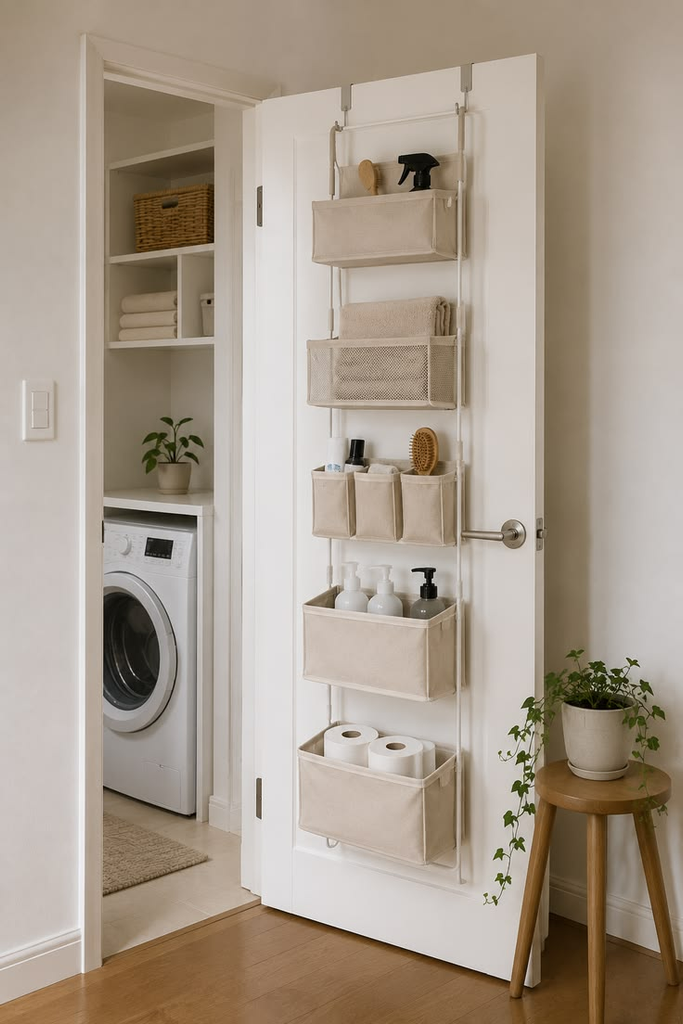
The why: the back of the bathroom door is prime real estate that almost nobody uses, and an over-the-door organizer needs zero hardware installation.
The how: canvas or mesh pocket organizers that hook over a standard door work in basically any bathroom with a door that swings — hair tools, extra toilet paper, first aid stuff.
Pro tip: measure your door thickness first. A lot of interior doors are 1 3/8 inch, but older buildings sometimes have thicker doors, and a hook that’s too small won’t sit flush.
7. Magnetic strips for metal tools
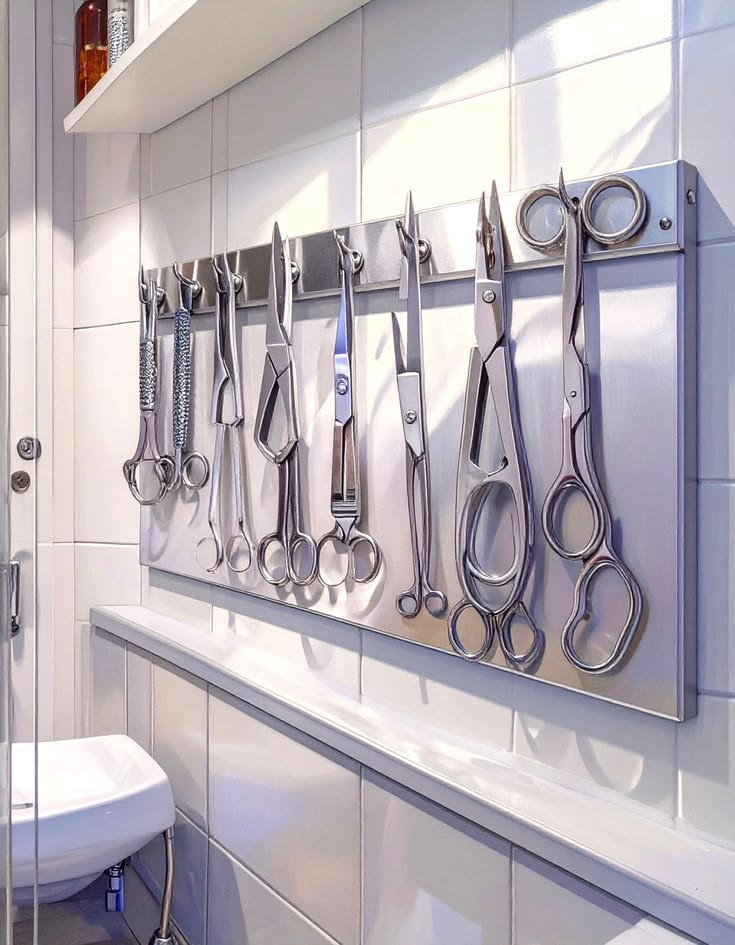
The why: if you’ve got a metal medicine cabinet or any exposed metal surface, a magnetic knife strip (yes, the kitchen kind) holds tweezers, nail clippers, and bobby pins without a drawer.
The how: mount it with adhesive strips on the inside of your medicine cabinet door.
Pro tip: this one only works if your cabinet is actual metal and not a mirror glued to particleboard — test with a fridge magnet before you buy anything.
8. A tension shelf above the toilet tank
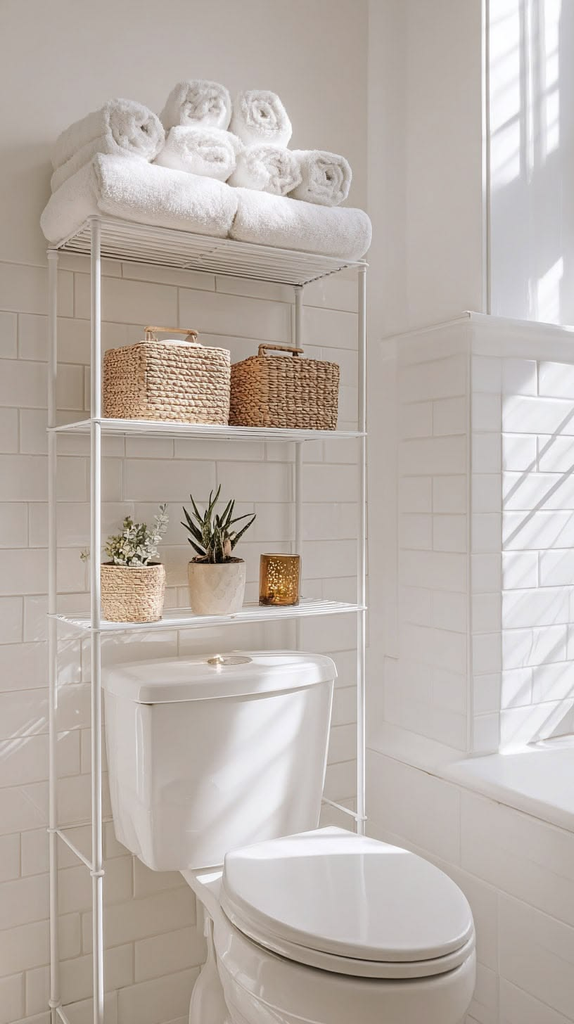
The why: a smaller-footprint alternative to the full over-toilet unit from idea #1, for bathrooms too tight even for that.
The how: a single floating-style shelf that rests directly on the tank lid, no mounting at all, gives you just enough space for a plant and a hand soap without eating floor space.
Pro tip: skip anything glass here — tank lids aren’t always perfectly level, and a glass shelf sliding off onto tile is a bad Tuesday.
Hardware & Fixture Swaps You Can Reverse
This is the category that actually changes how a bathroom looks and feels the most, in my experience — more than paint, more than decor. Old, mismatched hardware makes a bathroom look tired no matter how clean it is. The trick with rentals is keeping every original piece so you can swap back before you move out.
9. Cabinet knobs and pulls
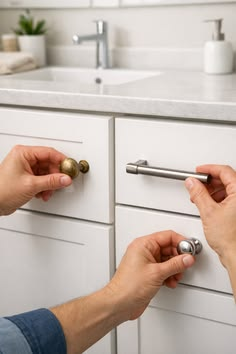
The why: builder-grade cabinet hardware is almost always the cheapest option a contractor could find, and it shows.
The how: most cabinet hardware uses standard screw spacing, so swapping is usually a five-minute job per drawer with a screwdriver you already own. Keep the originals in a labeled ziplock bag in your closet.
| Hardware type | Cost per set (avg) | Install time | Landlord-approval risk |
|---|---|---|---|
| Cabinet knobs/pulls | $15–$40 | 5–10 min | Low — fully reversible |
| Faucet/showerhead swap | $20–$80 | 15–30 min | Low–Medium — check for specialty fittings |
| Light fixture swap | $30–$100 | 30–60 min | Medium — some leases require electrician |
| Toilet seat | $20–$60 | 10 min | Low — fully reversible |
| Mirror frame kit | $25–$50 | 20 min | Low — fully reversible |
Pro tip: take a photo of your original hardware before you remove it, in case you forget which knob went where two years from now.
10. A new showerhead
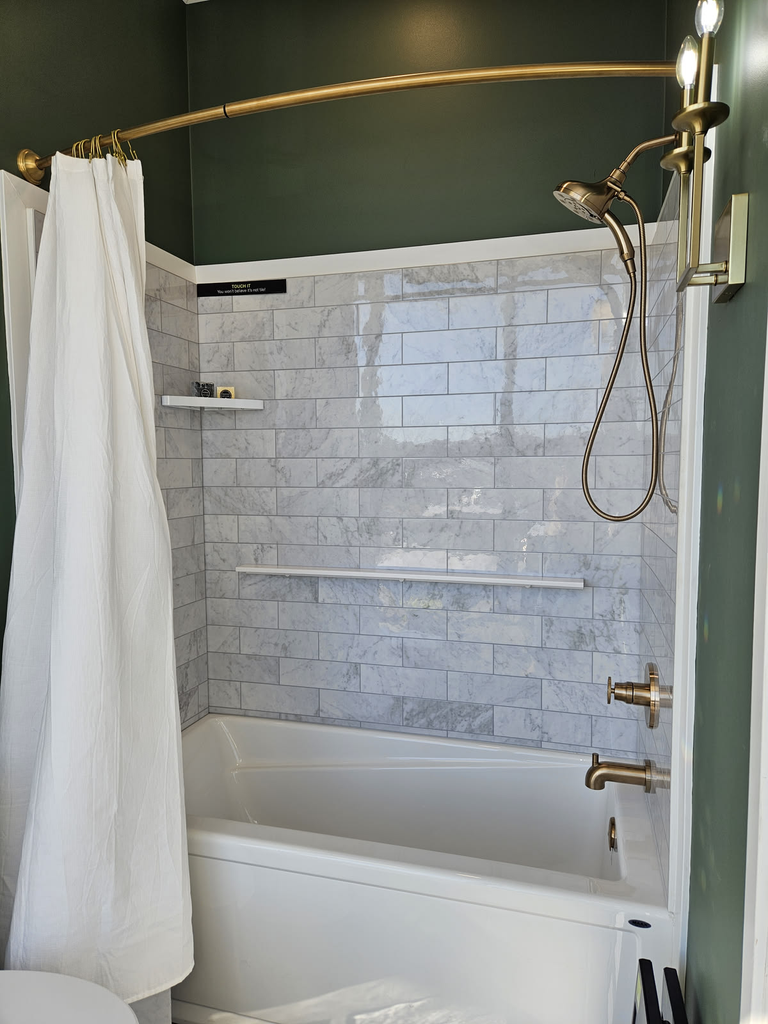
The why: rental showerheads are notoriously weak — low-flow models installed for water-bill reasons, not comfort — and it’s one of the cheapest upgrades that has an actual daily impact on your life.
The how: most US showerheads use a standard threaded connection, so you unscrew the old one (channel-lock pliers if it’s stuck), wrap the threads in plumber’s tape, and screw the new one on.
Pro tip: keep the original in a drawer. My friend Marcus forgot his was even swappable and left the upgraded one behind when he moved — free showerhead for the next tenant, unfortunately not for him.
11. Faucet aerator or full faucet swap
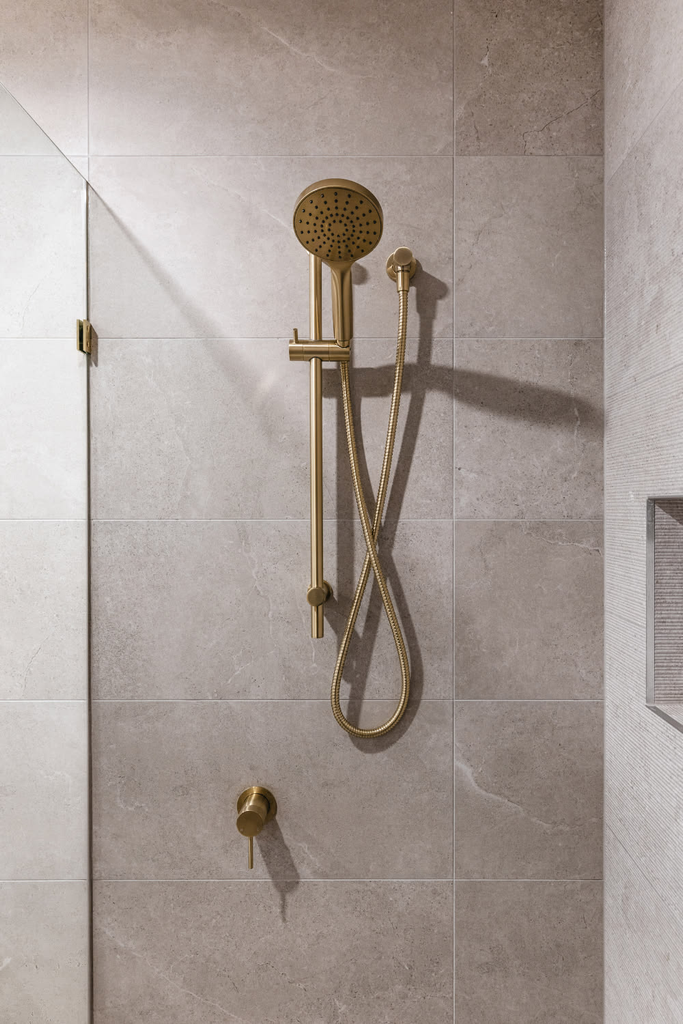
The why: a dated or corroded faucet finish is one of the first things people notice in a bathroom, and it’s often not actually attached with anything permanent.
The how: check underneath your sink first — if the faucet is on a standard supply line setup, a swap is usually doable with basic tools in under 30 minutes. If it’s a specialty or wall-mounted setup, stick to just replacing the aerator tip instead, which is a two-minute twist-off job.
Pro tip: bring your old faucet’s brand and model to the hardware store, or take a picture of the connections — mismatched thread types are the most common reason a DIY faucet swap goes sideways.
12. Toilet seat replacement
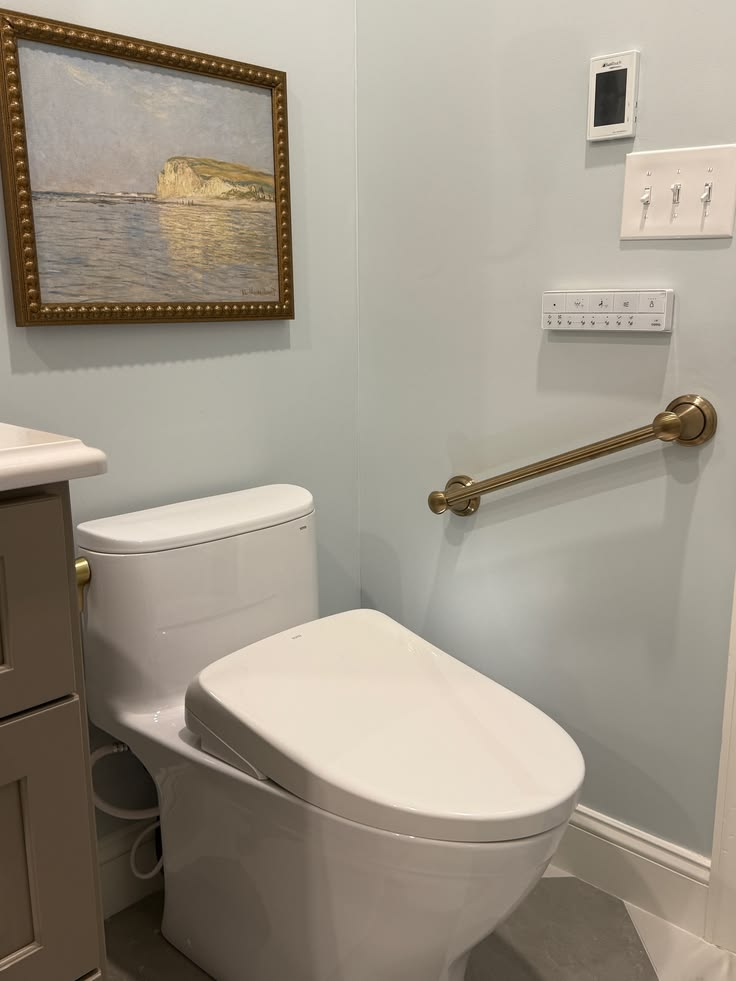
The why: this sounds minor but it’s one of those things where, once you upgrade it, the old one anywhere else feels wrong.
The how: standard toilets use one of two bolt spacings, both of which any hardware store toilet seat is built to fit. Ten minutes, one wrench.
Pro tip: this is genuinely one of the highest-impact-to-effort upgrades on this whole list. If you only do one hardware swap, this or the showerhead are the two I’d pick.
13. Cabinet or drawer liner instead of paint
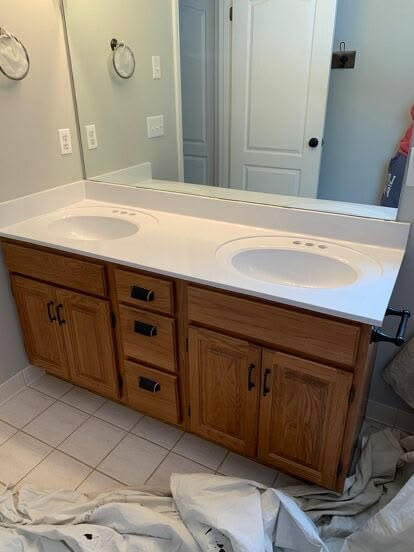
The why: instead of painting cabinets (which requires more commitment and more undoing), adhesive shelf liner gives cabinets a cleaner look and protects them from water damage.
The how: measure, cut, and press into clean, dry drawers and shelves.
Pro tip: the removable kind (versus permanent contact paper) peels off clean even after a year or two — check the packaging specifically says “removable,” not just “peelable.”
14. A mirror frame kit
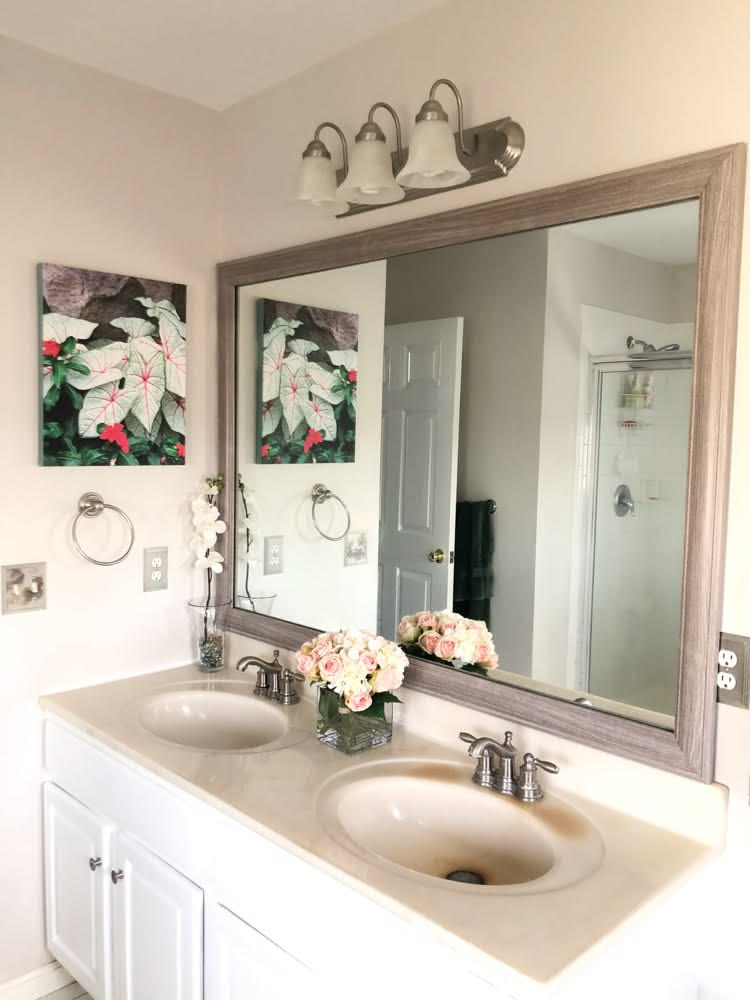
The why: a plain builder mirror with no frame is one of the biggest tells of an unstyled rental bathroom.
The how: peel-and-stick MDF or foam frame kits attach directly around the edge of an existing mirror with adhesive strips, no need to remove or replace the mirror itself.
Pro tip: measure twice here — these kits come in specific size ranges, and an ill-fitting frame with visible gaps looks worse than no frame at all.
Walls, Surfaces & Floors
Paint is usually off the table in a rental unless your lease specifically allows it, but there are a handful of ways to change the walls and floor that don’t involve a paintbrush at all.
15. Peel-and-stick wallpaper on one wall
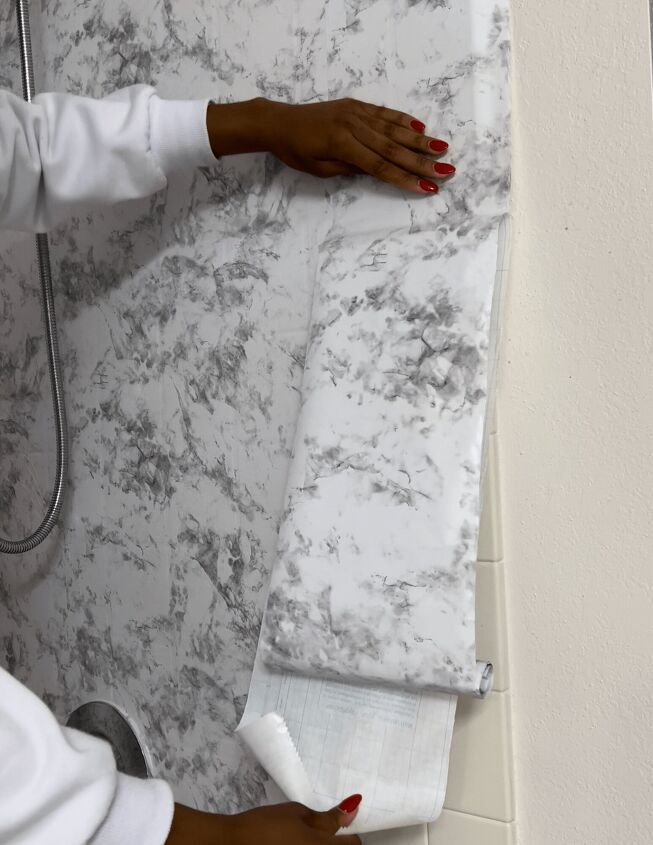
The why: a full bathroom of wallpaper is a big commitment and a bigger removal job, but one accent wall — often the wall behind the sink or a small strip above tile — gives a real design impact for a fraction of the effort.
The how: the removable vinyl kind (not the older paste-based type) applies dry-ish and peels off clean, even after months, as long as you’re not applying it directly over painted drywall that’s already peeling.
Pro tip: my sister did this in her rental’s powder room, and the one thing she’d do differently is buy 10% more than the calculator says you need — bathroom walls have more cutouts (outlets, towel bars, mirrors) than a bedroom wall, and you’ll waste more in trimming than you’d think.
16. Peel-and-stick floor tiles over ugly linoleum
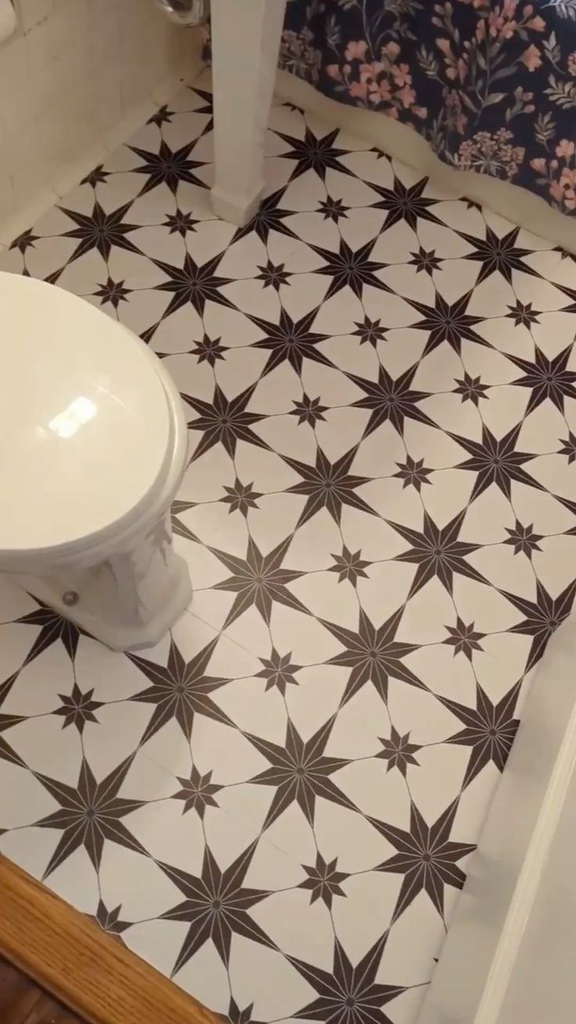
The why: rental bathroom flooring is often the single ugliest surface in the whole apartment, and it’s usually the last thing people think to address because “flooring” sounds like a bigger project than it actually is.
The how: vinyl peel-and-stick floor tiles go directly over existing linoleum or vinyl as long as the surface is flat and clean — no subfloor work required.
Pro tip: this is the one upgrade on this list where I’d genuinely test a single tile in an inconspicuous spot first and leave it a week before committing to the whole floor. Humidity in bathrooms is higher than in any other room, and not every peel-and-stick product is rated for it — check the packaging says “bathroom safe” or “high-moisture rated” specifically.
17. A tile decal border
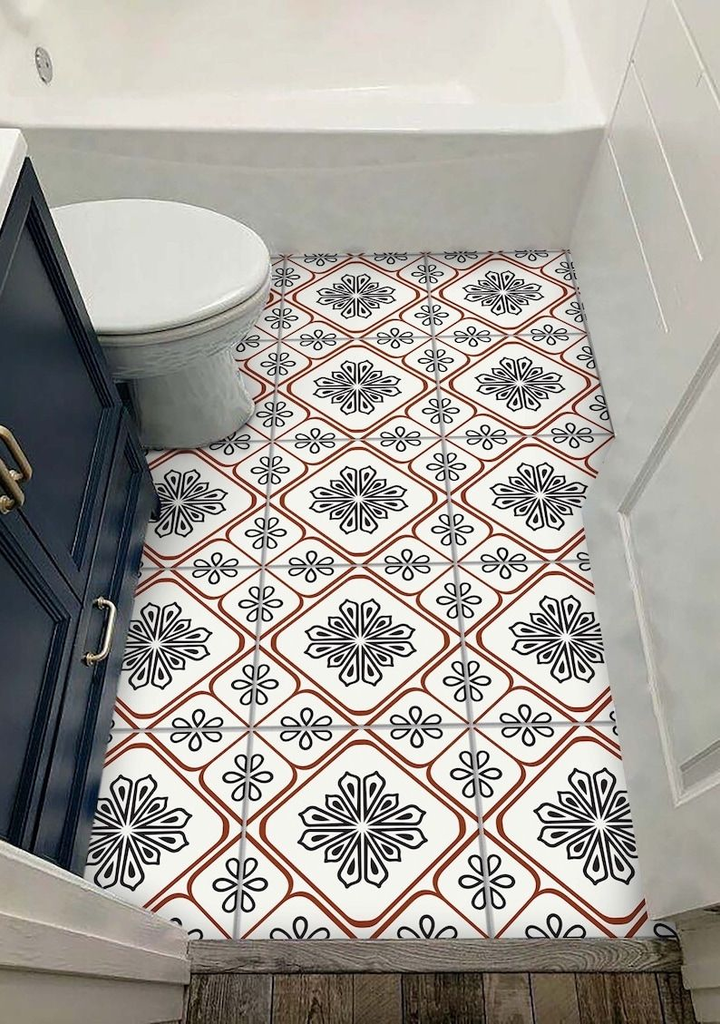
The why: if a full floor project feels like too much, a decal border along the base of the tub or around the sink backsplash adds detail without covering the whole surface.
The how: vinyl decals cut to strip width apply directly onto clean, dry tile grout lines.
Pro tip: skip anything with a matte finish in the shower area specifically — the glossy vinyl kind holds up to splashing much better over time.
18. Removable caulk-line covers
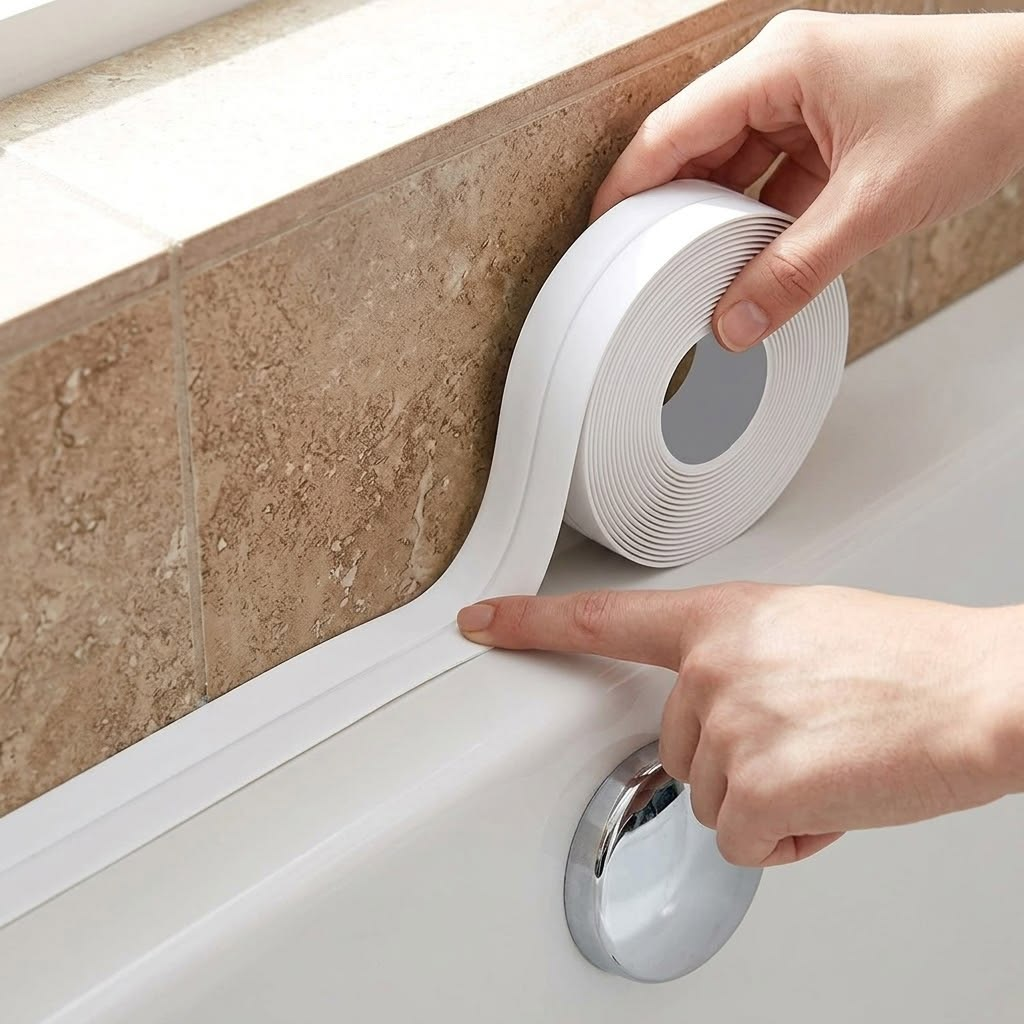
The why: old, yellowed caulk around a tub is one of those things that makes an entire bathroom look dirty even when it’s spotless.
The how: while re-caulking is possible in a rental (and often improves the space enough to be worth the small effort and a $6 tube of caulk), a faster no-commitment option is a self-adhesive caulk strip that sits directly over the existing line.
Pro tip: this only works well if the existing caulk isn’t peeling or moldy — if it is, that’s actually a maintenance request to your landlord, not a DIY cover-up, since mold under caulk is a real issue worth flagging.
19. A bath mat with actual texture
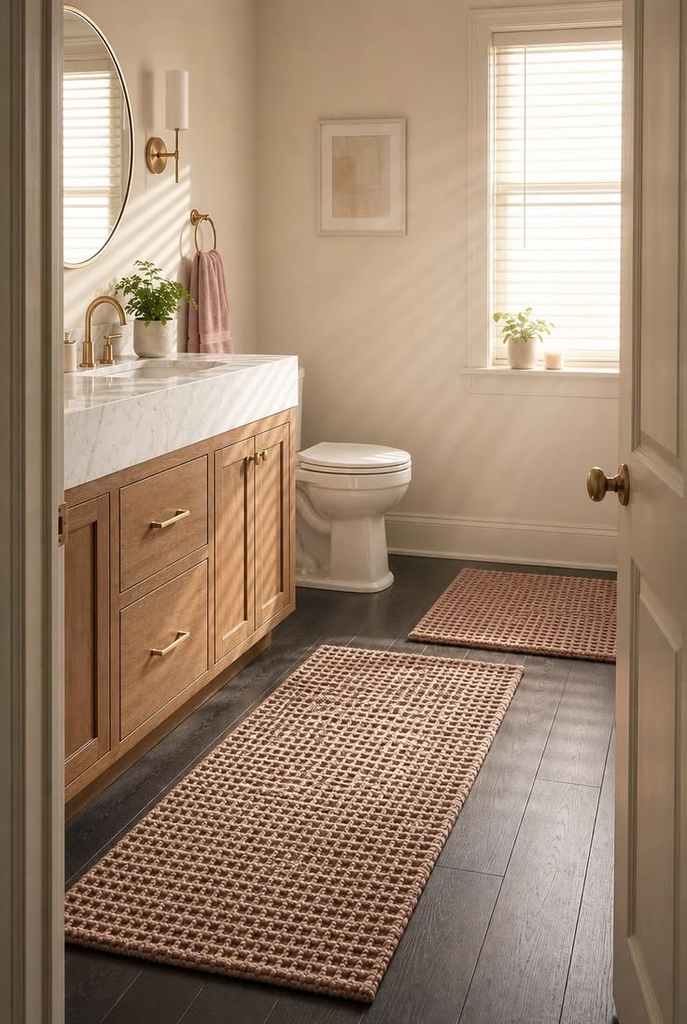
The why: this feels too simple to count as an “upgrade,” but a flat, thin bath mat versus a plush, textured one changes the whole feel of stepping out of a shower, and it’s zero commitment.
The how: just buy one. But go for a memory-foam or chunky-loop texture over a flat cotton one if you’re deciding between two similar prices — the price difference is usually under $10 and the daily-use difference is bigger than you’d expect.
Pro tip: get one with a non-slip rubber backing specifically rated for tile, not just “non-slip” in general — some backings work on carpet and slide right off tile.
20. Contact paper on a dated vanity top
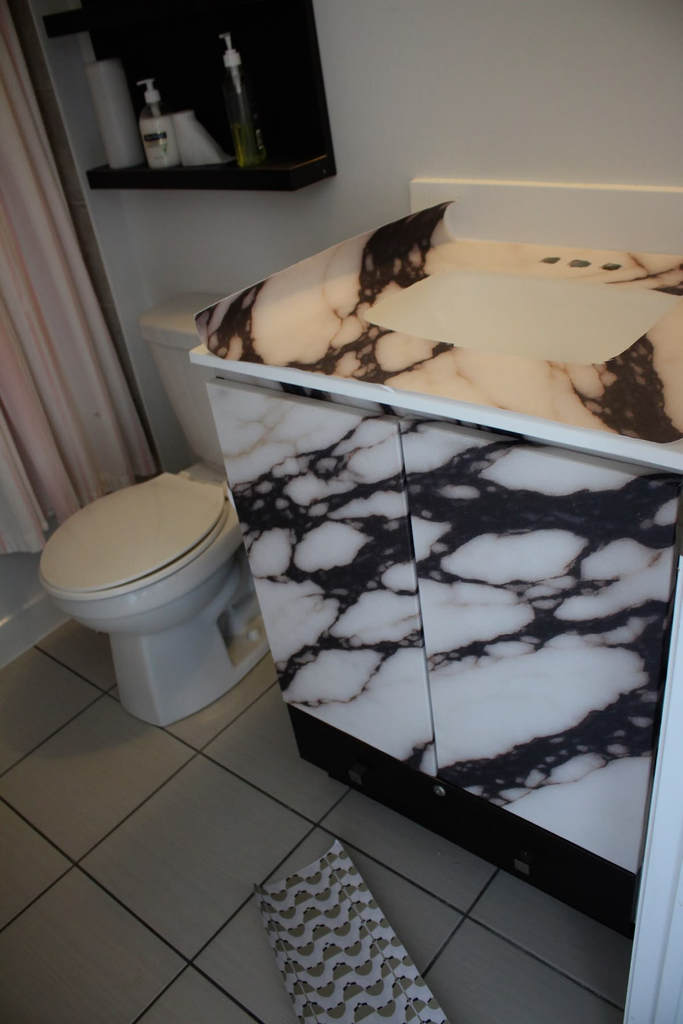
The why: laminate vanity counters in older rentals are often the most dated surface in the whole bathroom, more than the tile or the cabinets.
The how: heat-activated or adhesive-backed faux-stone contact paper can wrap directly over a laminate counter for a marble or granite look.
Pro tip: this is a more advanced install than most items on this list — corners and the sink cutout are the hard parts. If you’ve never done a contact paper project before, practice on a cabinet door first (see idea #13) before attempting the counter.
Lighting & Mirrors
Bathroom lighting in rentals is almost universally bad — a single harsh overhead bulb, or worse, one flat vanity strip that washes everyone out. This is a category worth investing a little more in, because bathroom lighting affects how you see yourself every single day.
21. A plug-in vanity light bar
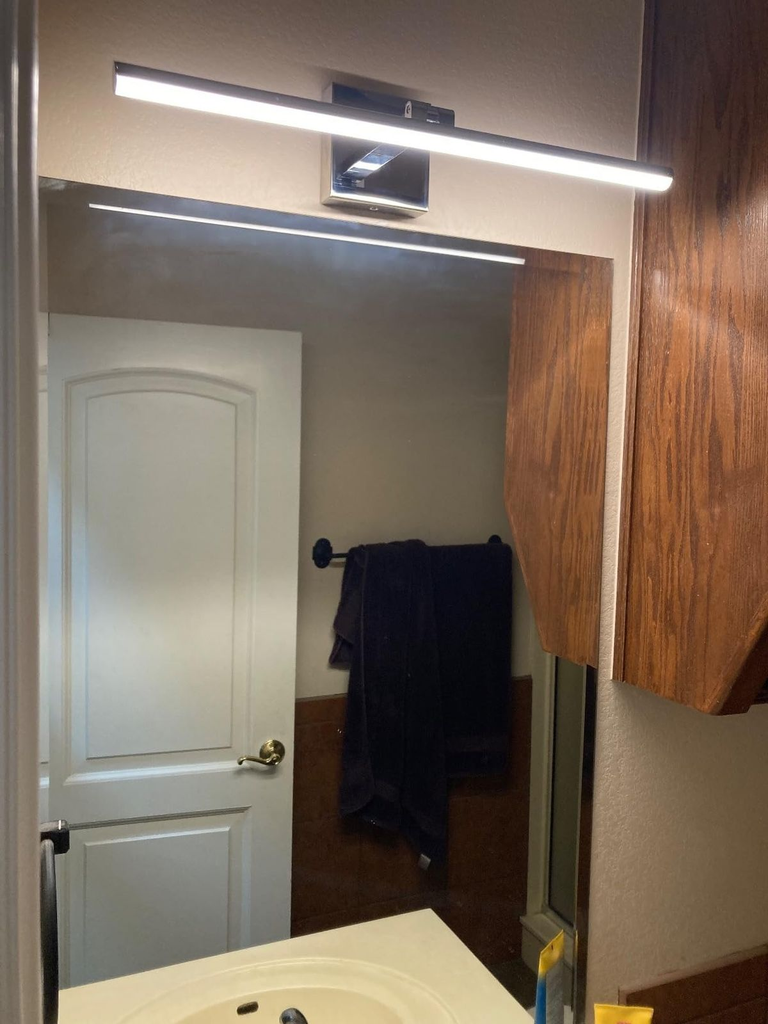
The why: if your lease doesn’t allow hardwiring a new fixture, a battery-powered or plug-in LED light bar mounted with adhesive strips solves the same problem without any electrical work.
The how: stick it to the wall or mirror frame at eye level, angled to avoid harsh shadows under the chin and eyes.
Pro tip: get one with adjustable color temperature. A lot of cheap LED bars default to a cold, clinical blue-white that’s genuinely worse for doing makeup or skincare than the dim yellow bulb it’s replacing.
22. Swap the bulbs, not the fixture
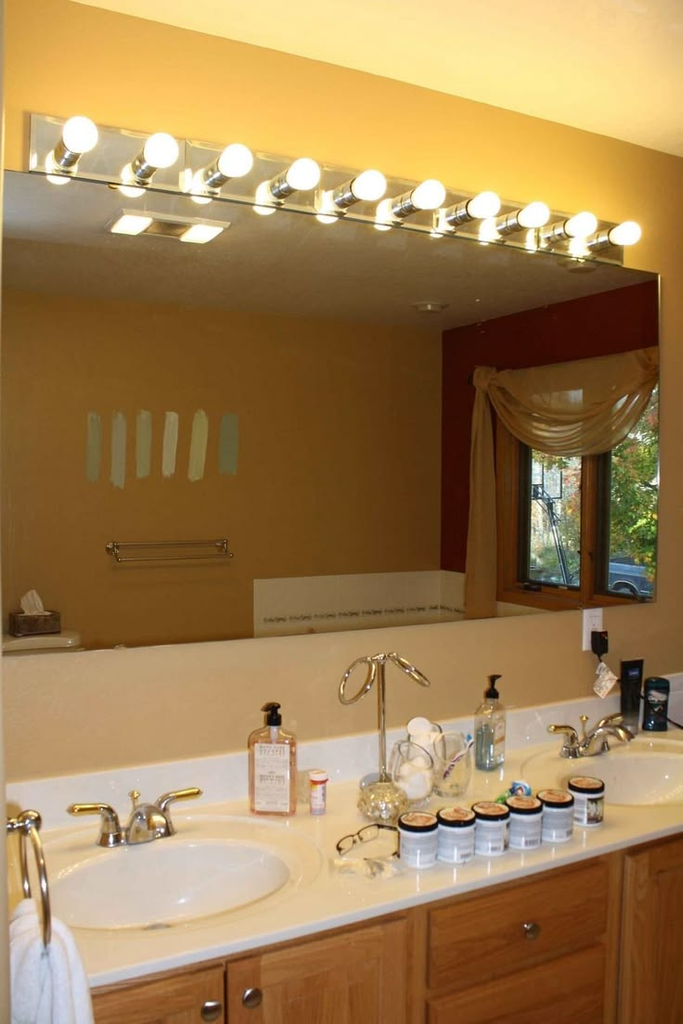
The why: this is the cheapest lighting fix on the whole list and most people skip it entirely.
The how: if your fixture takes standard bulbs, swap them for a warmer color temperature (2700K–3000K reads as cozy; the 5000K+ bulbs a lot of landlords install by default read as sterile and unflattering).
Pro tip: keep the original bulbs in a box somewhere — most leases don’t require you to leave specific bulbs behind, but it’s an easy thing to check off before your walkthrough.
23. A larger mirror leaned or hung with a removable strip
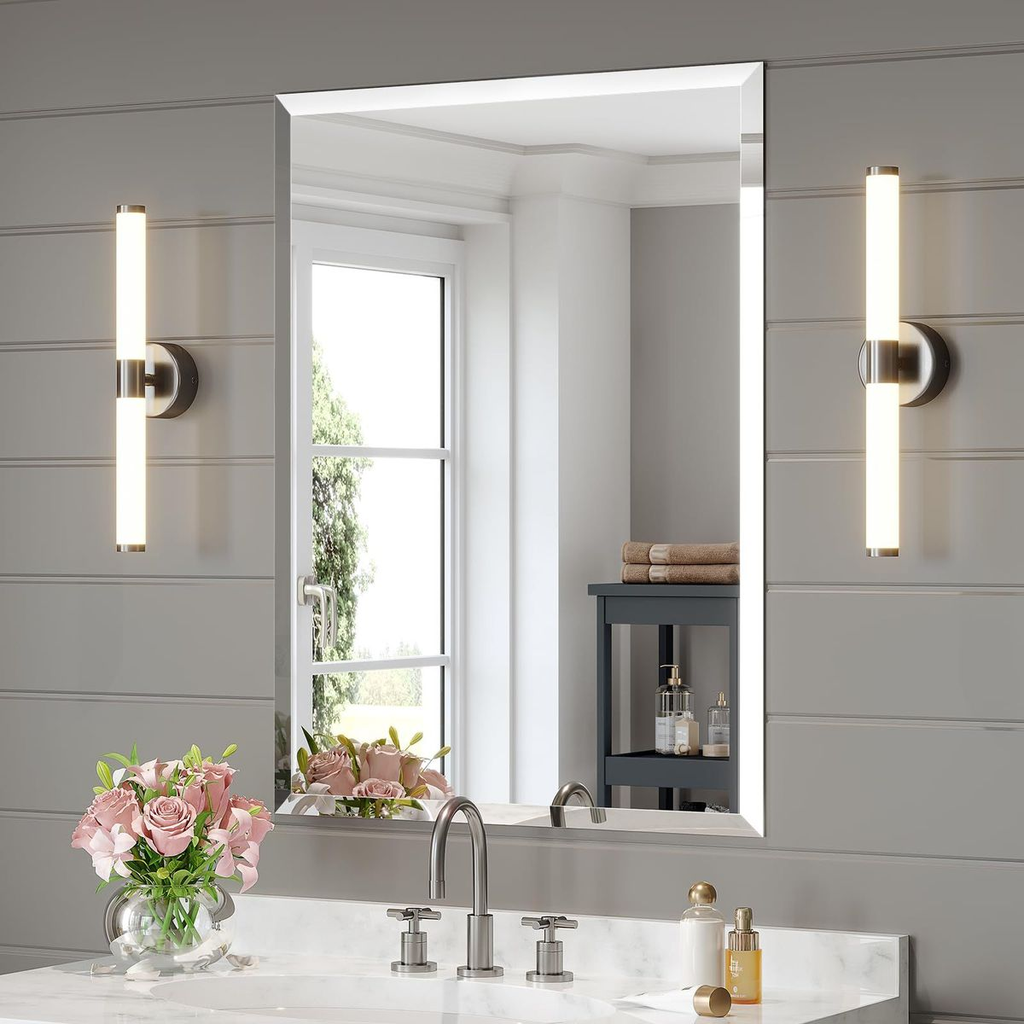
The why: the tiny medicine-cabinet mirror in a lot of rentals genuinely makes the whole room feel smaller than it is.
The how: heavy-duty removable mounting strips (rated by weight — check the label, most hold 10-16 lbs per strip) can hang a real mirror over or beside the existing one without drilling.
Pro tip: for anything over about 15 pounds, use at least four strips in a diamond pattern, not just two at the top — I learned this one the hard way when a mirror slid down my wall overnight and landed, thankfully unbroken, in a laundry basket that happened to be underneath it.
24. A dimmer plug adapter
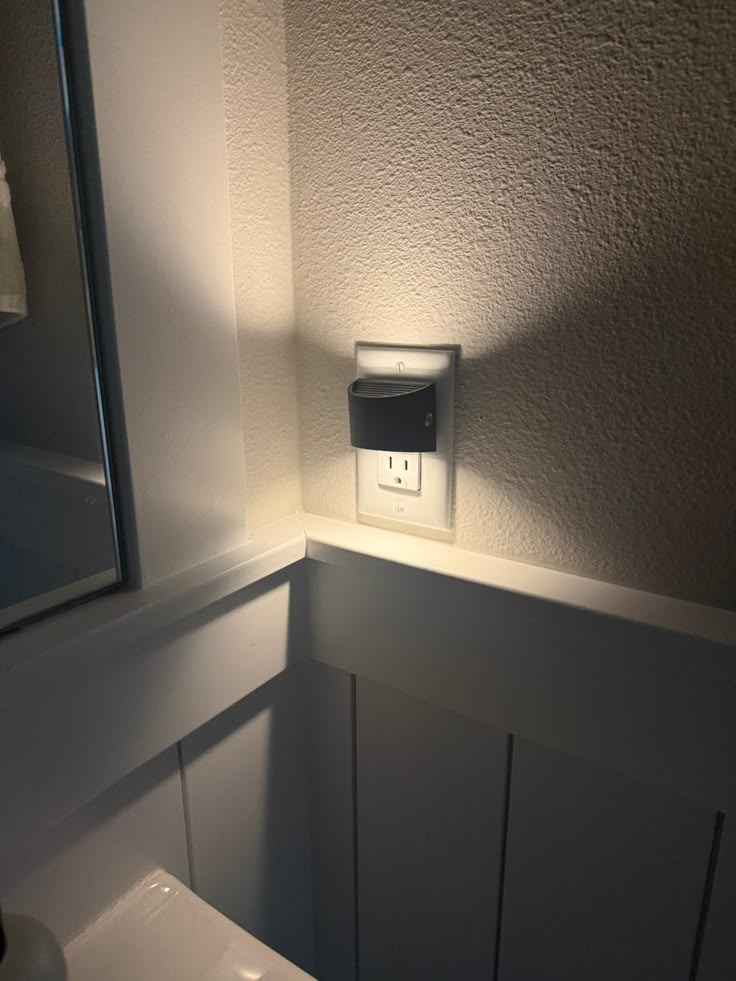
The why: bathroom lighting rarely has a dimmer built in, but the flat, bright overhead light that’s great for getting ready in the morning is the last thing you want at 11pm.
The how: for lamp-style bathroom lighting (less common, but exists in older buildings with a separate vanity lamp instead of a hardwired fixture), a plug-in dimmer switch works without touching any wiring.
Pro tip: this one’s more of a bonus for the specific setups where it applies — most hardwired bathroom fixtures won’t work with this trick, so check what kind of fixture you actually have before buying.
Textiles & Small Decor
None of these need any tools at all, and they’re the fastest way to make a bathroom feel less like a hotel and more like yours.
25. A shower curtain that actually fits
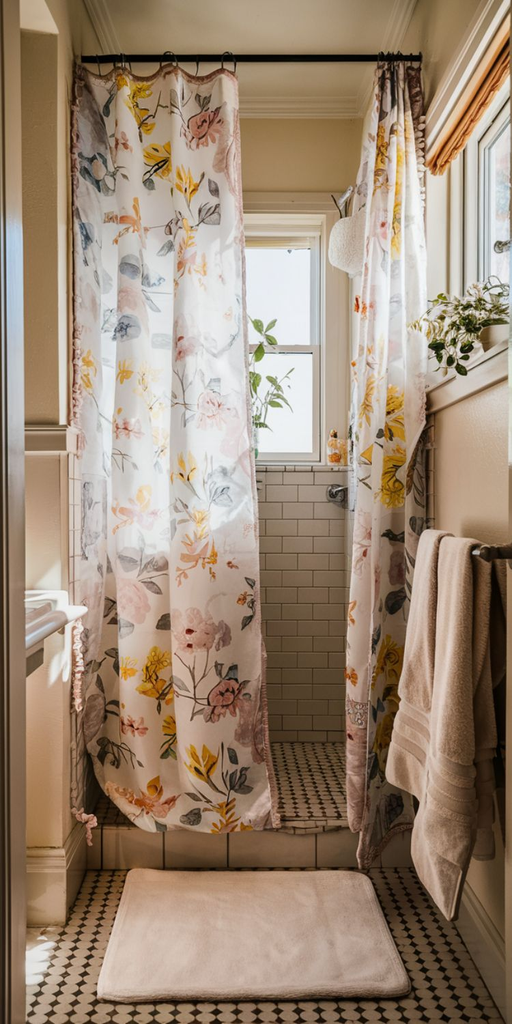
The why: the standard 70×72 inch curtain a lot of people default to often looks skimpy and short in bathrooms with taller ceilings or a wider tub.
The how: measure your actual shower rod width and ceiling height before buying — an extra-long or extra-wide curtain (typically 72×84) makes a small bathroom look noticeably taller.
Pro tip: a fabric liner underneath a decorative outer curtain looks more expensive than a single vinyl curtain, and it’s not actually more expensive to buy both.
26. Coordinated towels, not matching towels
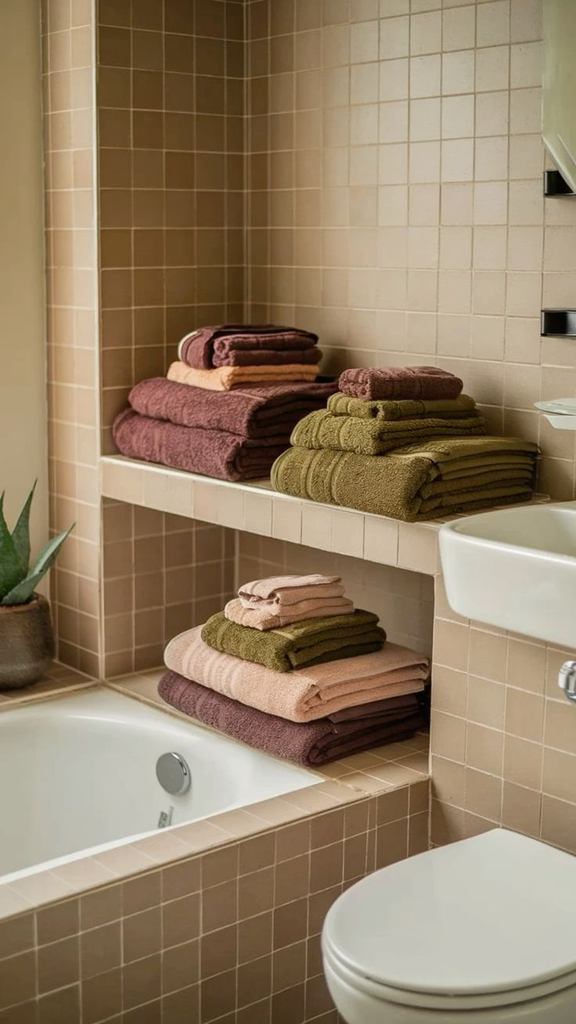
The why: matching towel sets can look flat and hotel-like; coordinated-but-not-identical towels (same color family, different textures or slightly different shades) read as more intentional.
The how: buy your bath towels and hand towels from different lines within the same general palette instead of a single boxed set.
Pro tip: this is the kind of tip that sounds like a stretch until you actually try it — my own bathroom went from looking like a Marriott to looking like a place a person lives just from mixing a rust-colored waffle-weave hand towel in with cream bath towels instead of buying the matching three-piece set.
27. A small plant that tolerates bathroom humidity
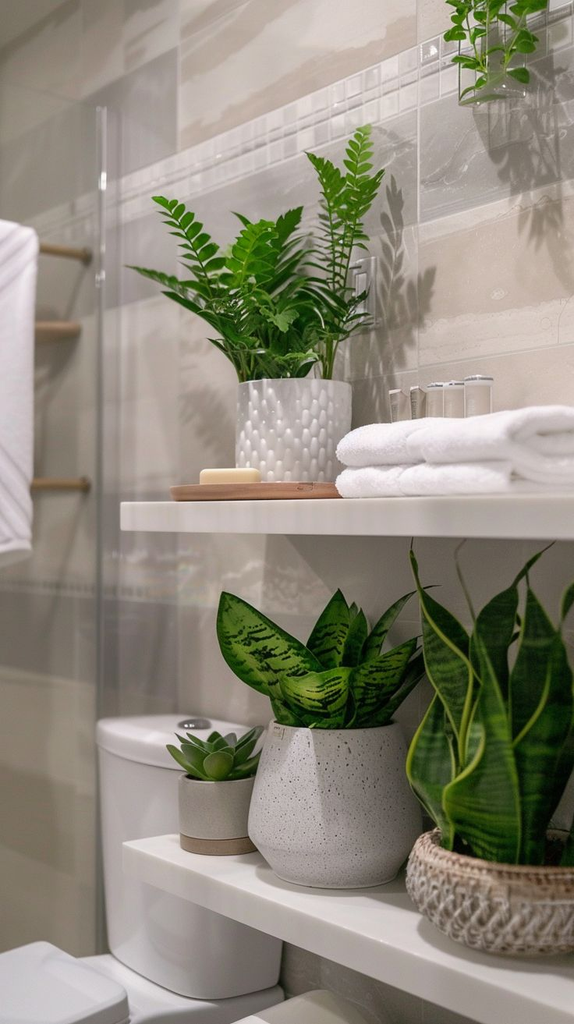
The why: low light and high humidity kill most houseplants, but a handful of species genuinely thrive in exactly those conditions.
The how: pothos, snake plants, and Boston ferns are the most forgiving options for a bathroom with a window or even just decent artificial light — you don’t need direct sun for any of these three.
Pro tip: skip anything that needs “bright indirect light” as a baseline unless your bathroom actually has a window — most rental bathrooms don’t, and a plant that’s slowly dying is worse for the vibe than no plant at all.
28. Fabric or removable wallpaper drawer liners in the medicine cabinet
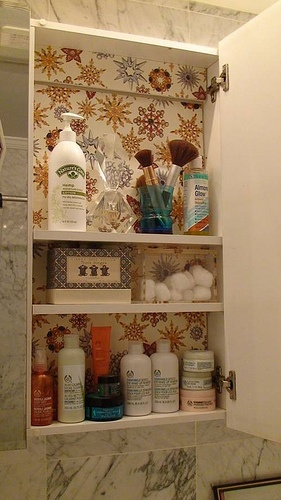
The why: opening a medicine cabinet to bare, scuffed metal shelving is a small thing, but it’s one of those details that shows up every single day.
The how: cut adhesive shelf liner (same product as idea #13) to fit the cabinet shelves specifically.
Pro tip: a patterned liner here is lower-commitment than anywhere else in the bathroom since almost nobody but you ever sees inside your medicine cabinet — it’s a good place to try a bold print you’re not sure you’d want on a full wall.
29. A small woven basket for rolled towels
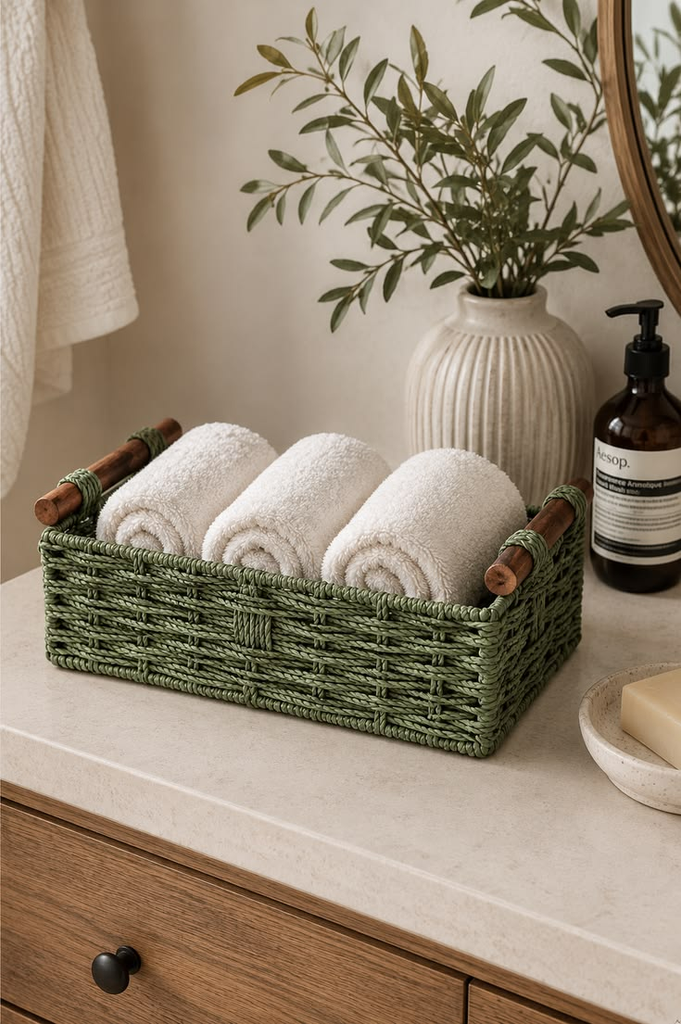
The why: a stack of folded towels on an open shelf looks fine; a basket of rolled towels looks like something out of a spa, for the same number of towels.
The how: any wide, shallow basket works — roll towels lengthwise and stand them on end rather than stacking flat.
Pro tip: go one size bigger than you think you need. A basket that’s slightly too big for your current towel collection looks intentional and gives you room to grow; a basket that’s exactly towel-sized looks cramped within a month.
Small-Luxury & Tech Extras
These are the upgrades I’d call optional-but-worth-it — not essential fixes, but the kind of thing that makes a rental bathroom feel like an actual retreat rather than just a functional room.
30. A bidet attachment
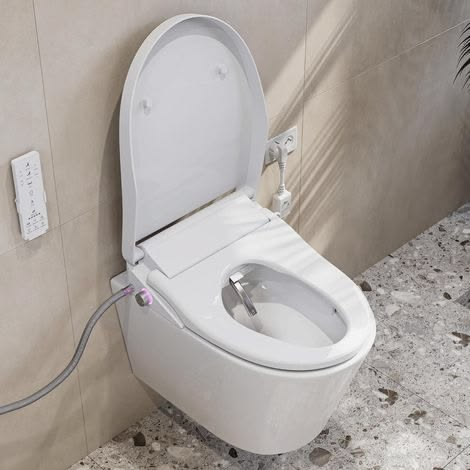
The why: a bidet attachment installs between your existing toilet tank and bowl without replacing the toilet itself, and it’s become genuinely popular in rentals specifically because it’s fully removable.
The how: most attachments are a DIY install under 30 minutes with tools you likely already own — the water line connects to your existing toilet supply valve.
Pro tip: budget for a slightly higher-end model than the cheapest option available. My cousin went through two bargain models that developed leaks at the valve connection within a year before landing on a mid-range one that’s held up fine for over two years now.
31. A tension shower shelf with a built-in speaker or fog-free mirror add-on
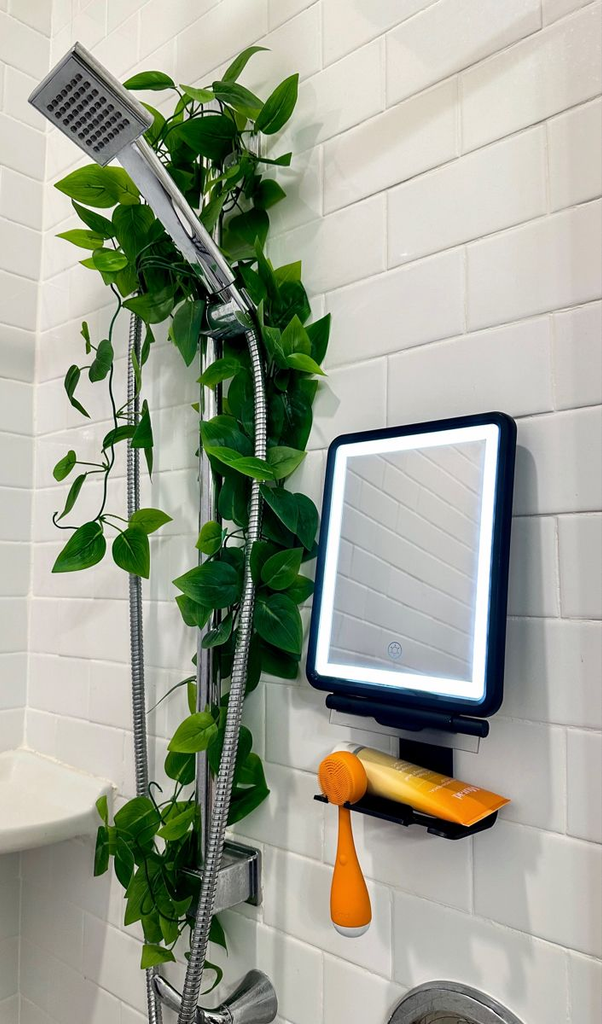
The why: this is purely a comfort upgrade, but a small fog-free shower mirror or a waterproof speaker that clips onto a tension rod adds a genuinely different feel to a daily routine, for not much money.
The how: both attach with suction cups or clips to existing hardware — no adhesive, no drilling, fully portable between apartments.
Pro tip: check the battery life specs before buying a shower speaker — a lot of the budget ones claim 8+ hours but that’s usually measured at low volume; realistic use in a small tiled bathroom (which amplifies sound) is closer to 4-5 hours per charge.
What I’d Actually Do First
If I were starting from scratch in a new rental bathroom tomorrow, I wouldn’t do all 31 of these at once — nobody has that kind of weekend. I’d start with the showerhead and toilet seat swap (ideas #10 and #12) because they’re the cheapest, fastest, and most reversible things on this list, and you feel the difference immediately, every single day.
Then I’d move to cabinet hardware and a real bath mat, because those two things alone change how the room looks in photos and in person. Everything else — the wallpaper, the peel-and-stick floor, the bidet — I’d let build up over a few months as I figured out what the space actually needed, rather than trying to nail the whole room in one trip to the hardware store.
The best part about all of this is that none of it is permanent. If you move next year, or the year after, everything on this list packs into a box or peels off clean, and you get to do it all again somewhere new.

Leave a Reply